
Has it ever happened to you that a Home Assistant integration stops working without warning? It’s frustrating when you rely on an automation that depends on these integrations and it fails just when you need it most.
Integrations like AEMET, Roborock, Tapo, or SmartThings sometimes get “stuck” and need to be manually reloaded. But what if I told you that you can automate this process?
Today you’re going to learn what blueprints are in Home Assistant and how to use one I’ve created to revive dead integrations automatically.
Why do integrations “die” in Home Assistant?
To understand why integrations stop working, we need to understand how they work. Integrations connect to devices or third-party servers to get data. Let’s take these integrations as examples:
- AEMET: Connects to the government’s weather API.
- Roborock: Communicates with their servers to manage your cleaning robot.
- Tapo: Accesses TP-Link cameras.
- SmartThings: Syncs data with Samsung’s server and in turn with your appliances.
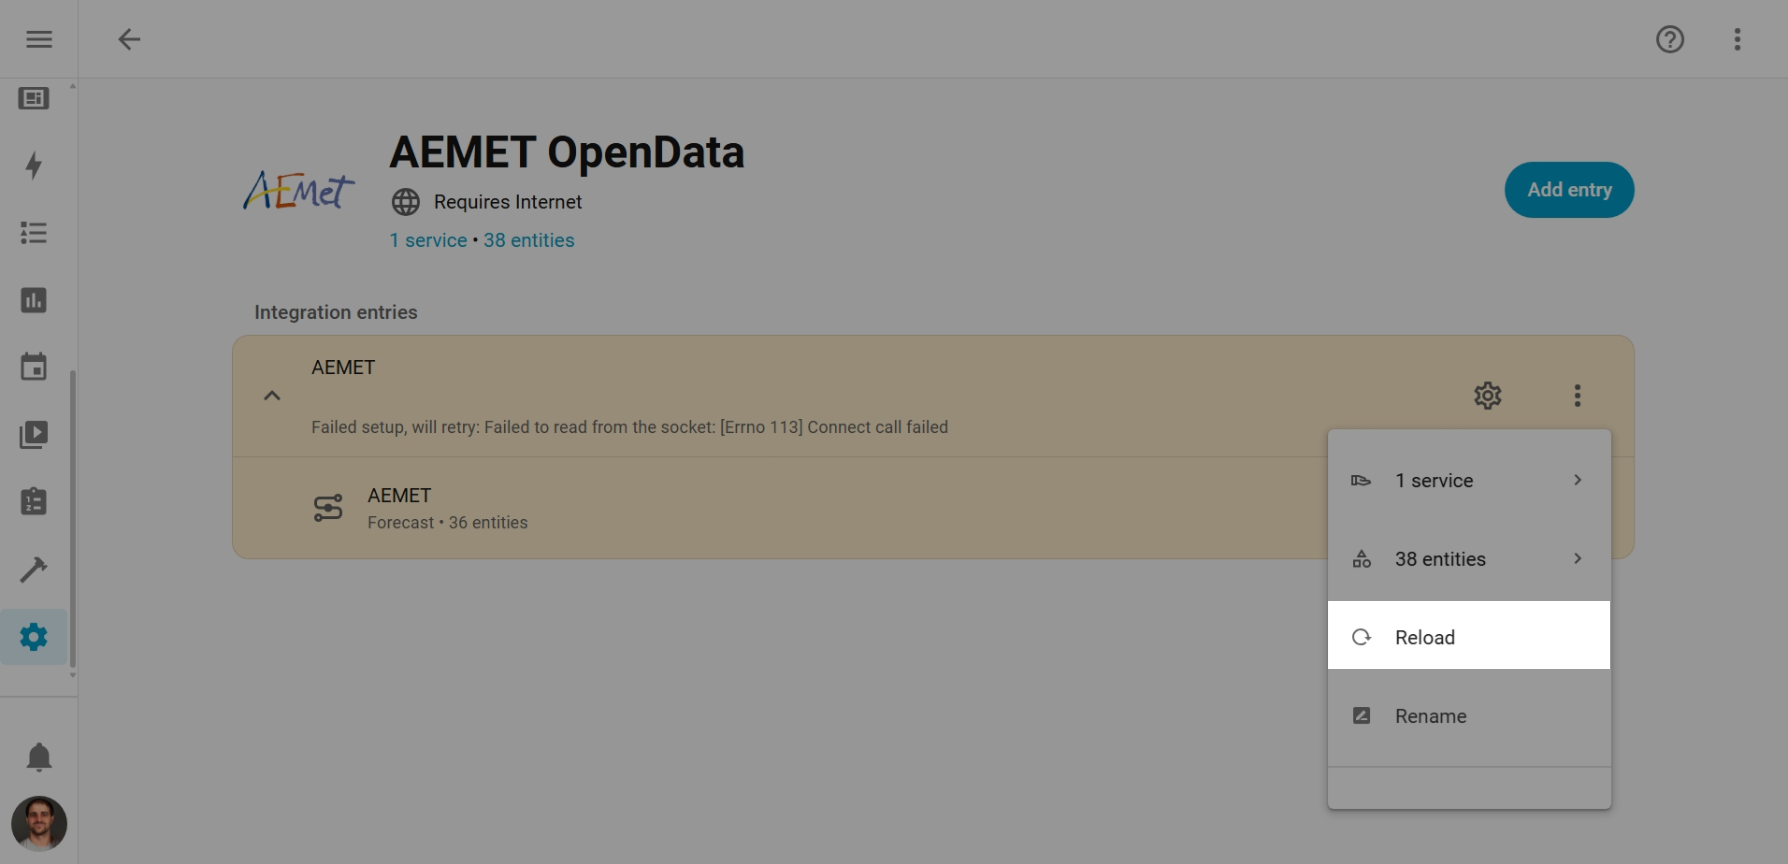
When there are connectivity issues, server maintenance, or simply temporary failures, these integrations remain in “Unavailable” state and stop responding.
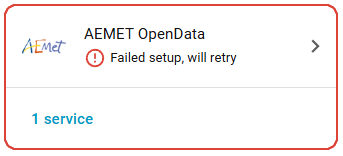
Home Assistant will try to reconnect automatically, but after several failed attempts, it will give up. Then it’s up to us to manually reload the integration from Settings -> Devices & Services.
But we came here to automate things! That’s why I’ve created a blueprint that reloads these integrations automatically.
What are blueprints in Home Assistant?
First of all, let’s explain what blueprints are. They are like smart templates for automations, scripts, and template helpers that other users can import and easily customize.
💡 Note: Although in the documentation and community they are known as blueprints, we’ll use this term to help you find information without problems.
Where to find blueprints?
- Home Assistant Community: The official forum has thousands of shared blueprints
- GitHub: Many users publish their blueprints in personal repositories
- Reddit: The r/homeassistant community frequently shares blueprints
- YouTube: Creators like me include links to our blueprints in video descriptions
Blueprint advantages
- ✅ Easy installation: One click to import
- ✅ Guided configuration: Visual interface to customize
- ✅ Reusable: Create multiple automations from the same blueprint
- ✅ Updates: The author can improve the template and you can update it with a button.
- ✅ Community: Thousands of blueprints created by users
Blueprints are perfect for users who want advanced automations without complications or writing YAML code. Let’s see how they work with a practical example.
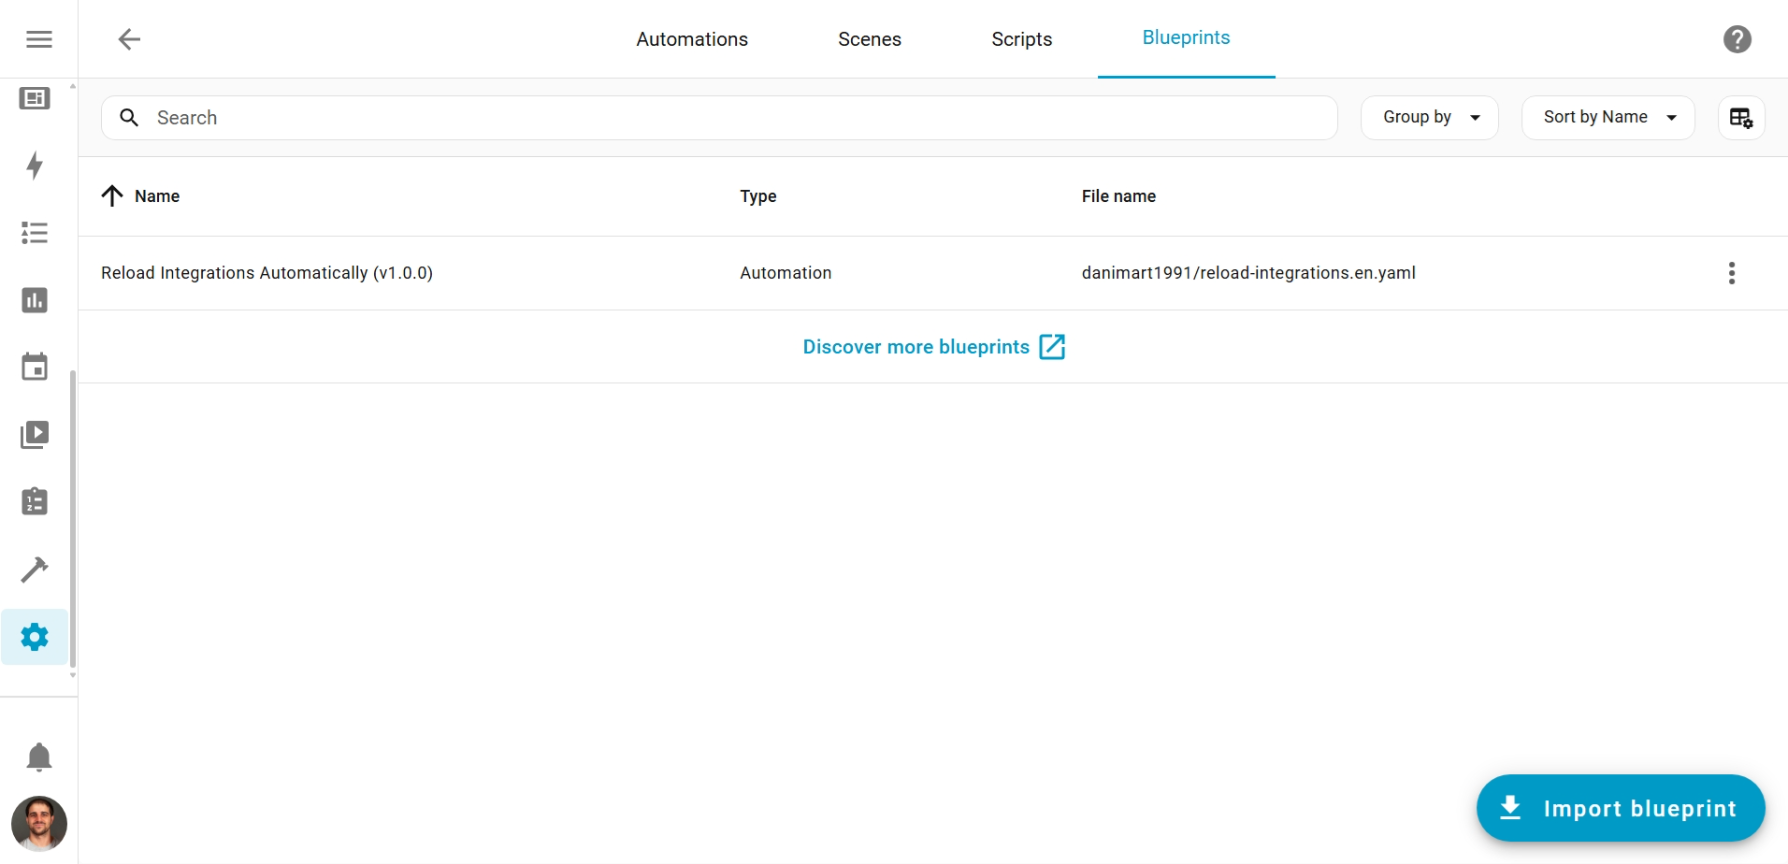
The blueprint: “Reload Integrations Automatically”
I’ve created a blueprint that monitors the entities you choose and when it detects that their state is “Unavailable” for a few minutes…
- Tries to reload the integration several times.
- Waits between attempts to give time to recover.
- If it can’t recover it, it sends you a custom notification.
Quick Import
You can import this blueprint directly by clicking this button:

Or manually from Settings -> Automations & Scenes -> Blueprints -> Import Blueprint with this URL:
| |
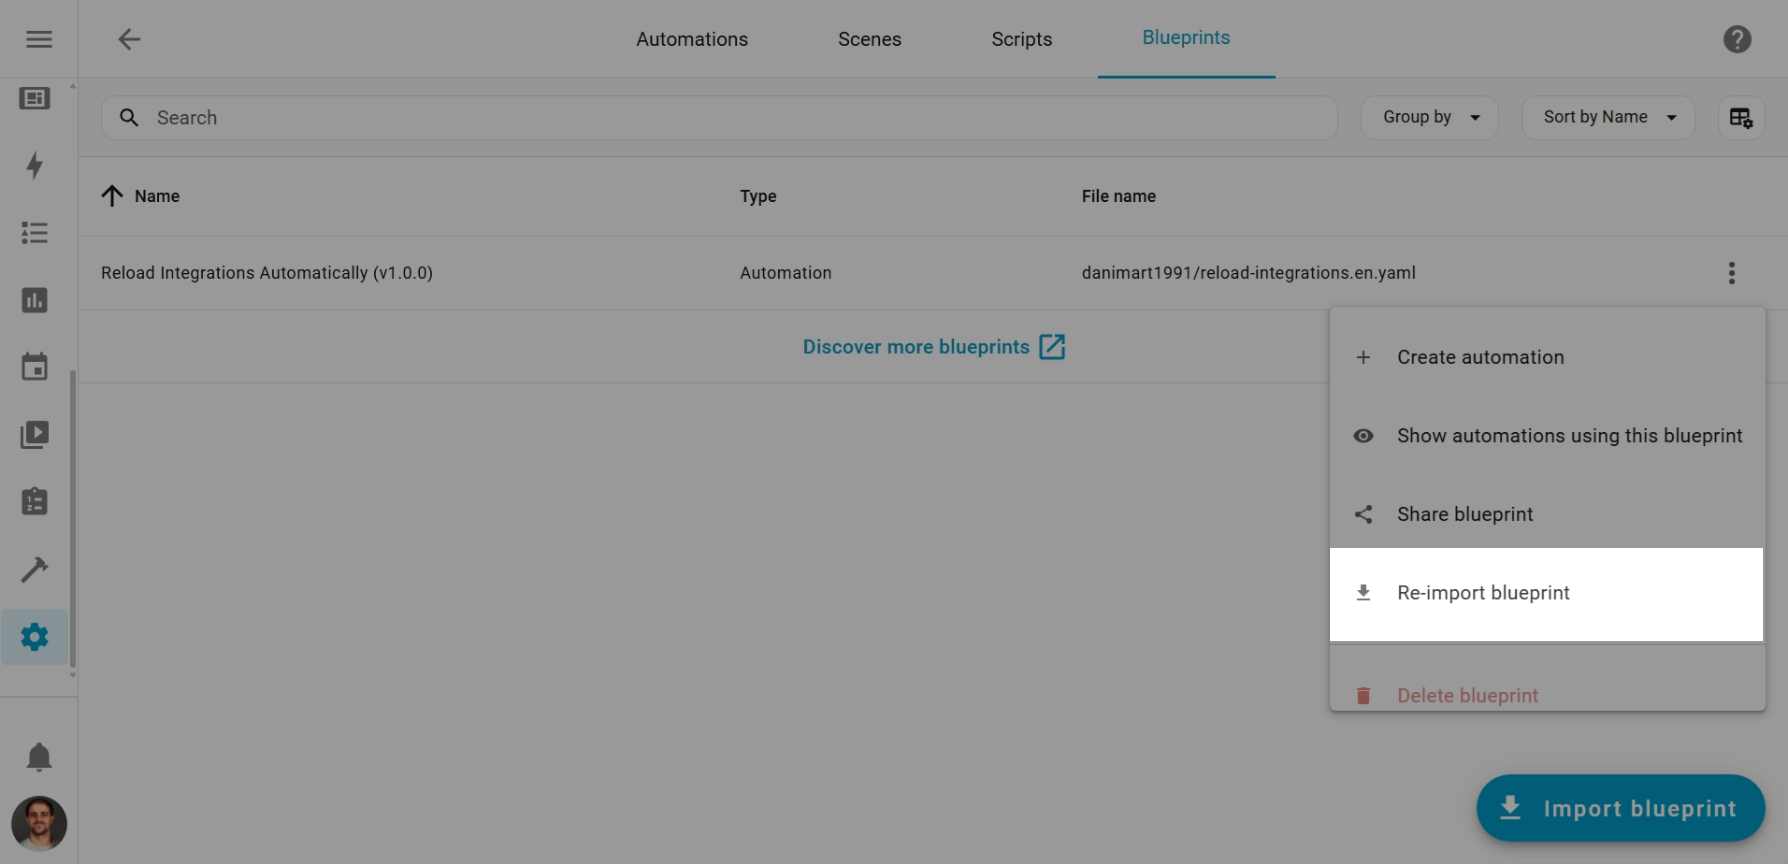
If you want to update a blueprint you already have imported, just go to the blueprints section, click the three dots on the one you want to update and select “Re-import blueprint”.
Using blueprints
Once the blueprint is imported, go to Settings -> Automations & Scenes -> Create Automation -> Use Blueprint and select “Reload Integrations Automatically”.

Usually, the configuration process is very simple and intuitive. It usually comes in the blueprint description itself. As an example, let’s see how to configure this one.
General Configuration
Entities to monitor: Select the entities that usually get stuck as “unavailable”:
weather.aemet- For AEMET integrationvacuum.roborock_s5_max- For Roborock/Xiaomi robotssensor.samsung_1234- For Samsung SmartThingsswitch.tapo_c210_privacy- For Tapo cameras- …
Time between attempts: How long to wait to verify if the integration is stuck:
- 5 minutes: For stable integrations (recommended)
- 2 minutes: For devices that disconnect frequently
- 10 minutes: For slow connections
Maximum number of attempts: How many times to try reloading the integration before giving up:
- 3 attempts: For stable services
- 5 attempts: Recommended value
- 10 attempts: For very problematic cases
Notification Configuration
The most important part: what to do when the integration can’t be recovered after several attempts?
Here you can configure any action in Home Assistant that you want to do like notifications or turning on a warning light:
By default, it comes with a basic notification configured, but you can customize it as you want. Here are some examples:
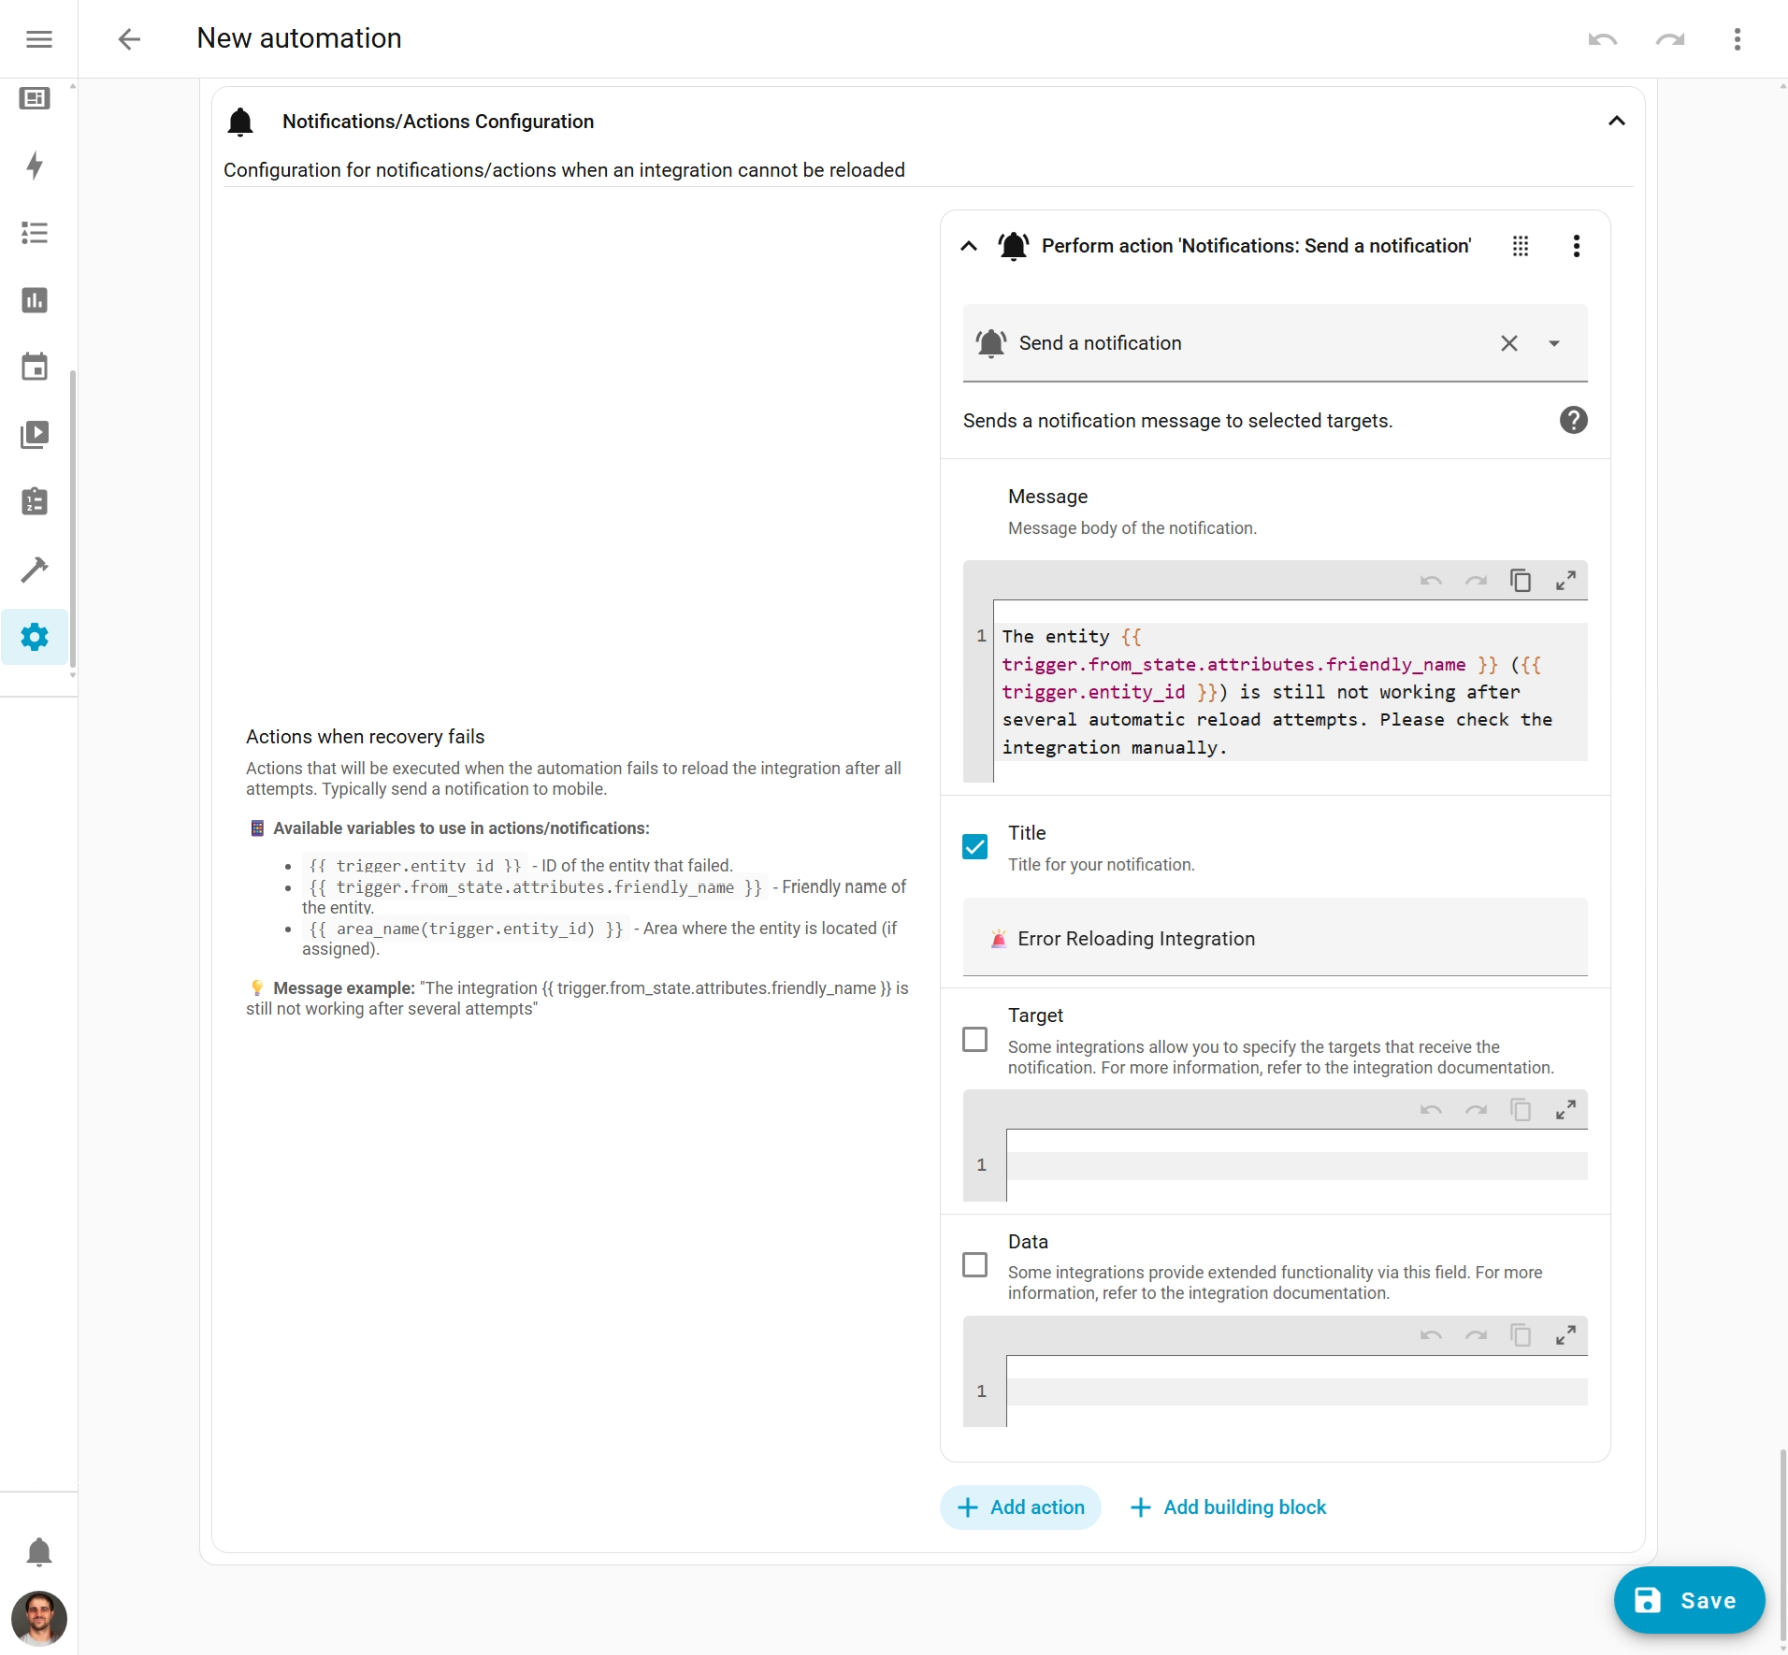
Basic notification (comes by default):
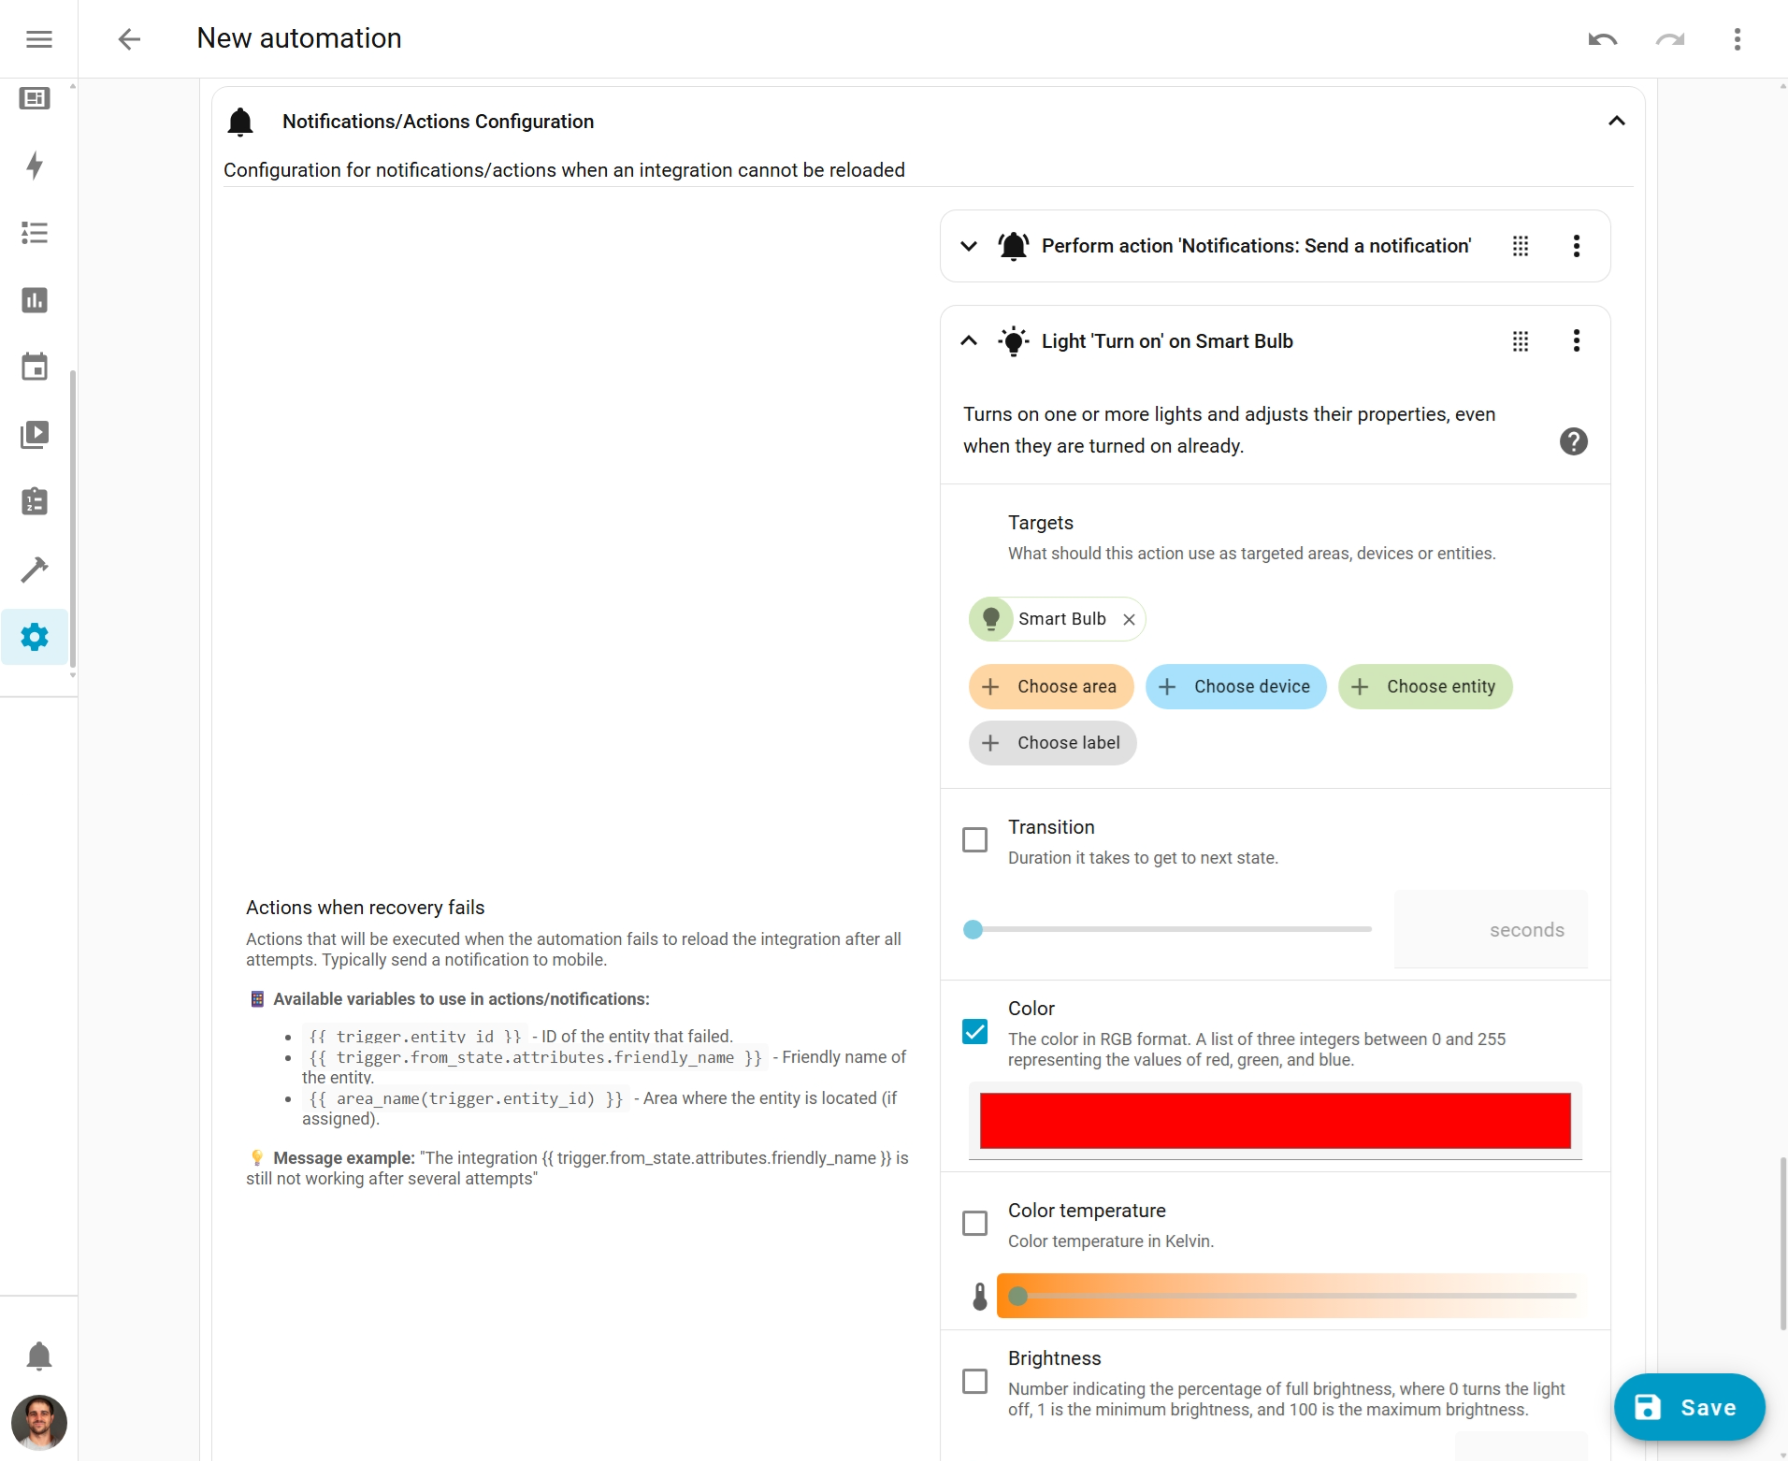
Turn on a light:
To customize your messages, you have several Available Variables. Using them is as simple as including them in the message with {{ }}:
{{ trigger.entity_id }}- Entity id{{ trigger.from_state.attributes.friendly_name }}- Friendly name{{ area_name(trigger.entity_id) }}- Area where it’s located
You’re free to put whatever actions you want according to your needs.
Creating the automation
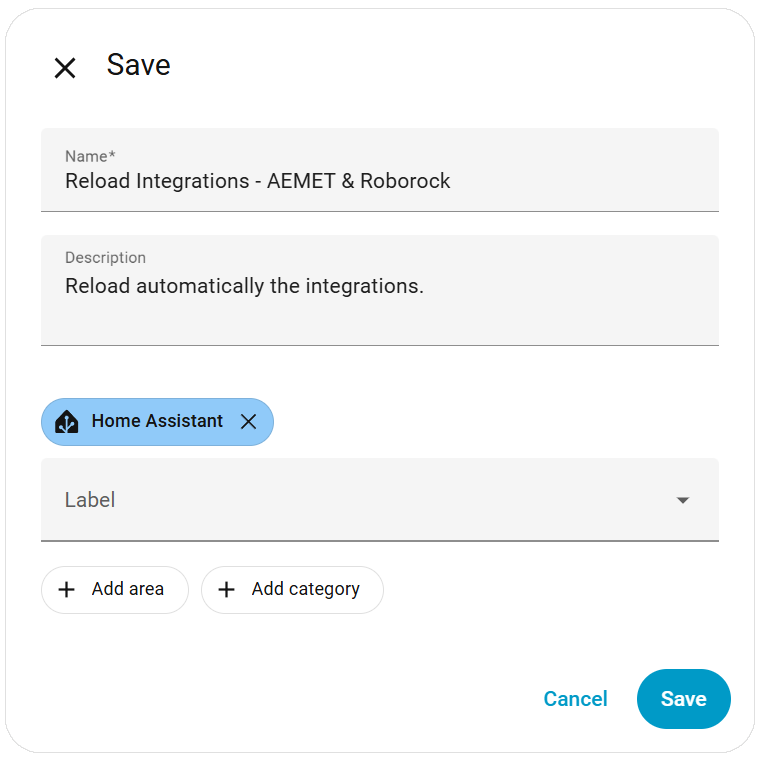
Once the parameters are configured, just save. Give it a name like “Reload Integrations - AEMET and Roborock”.
And optionally:
- Add a description to identify it easily
- Add the automation to an area
- Add categories and/or tags to better organize your automations
Ready! Your automation is now working!
BONUS: How does it work inside? (For the curious)
If you want to understand the internal workings of the blueprint, here’s a simple explanation.
The monitoring: The automation continuously observes the entities you’ve selected. When it detects that one has been in “Unavailable” state for the configured time, it activates.
The retries: Once activated, it enters a loop that repeats these steps:
- Executes the
homeassistant.reload_config_entryaction to reload the entire integration - Waits the configured time to give margin for recovery
- Verifies if the entity is already working
- If it’s working, stops the process; if not, continues with the next attempt
The final notification: If after all attempts the integration still doesn’t respond, it executes the actions you’ve configured (usually notifications).
Simple, but effective.
Conclusion
Blueprints are the perfect solution for those who want powerful automations without complications. They leverage the power of the community: with a single click you import automations and scripts tested by thousands of users and adapt them to your smart home.
With this blueprint, you won’t have to manually check if integrations are working anymore. The system self-repairs and will only notify you when it really fails.
See you in the next article!
References
- Home Assistant Official Documentation: Blueprints - Official documentation about blueprints
- Home Assistant Community: Blueprint Exchange - Community forum to share blueprints
- Home Assistant Developer Docs: Creating Blueprints - Developer guide for creating blueprints
- Home Assistant Core: homeassistant.reload_config_entry - Documentation for integration reload service
- GitHub Repository: danimart1991/home-assistant-blueprints - Repository with the blueprint mentioned in the article
- Reddit: r/homeassistant - Home Assistant user community
- Home Assistant Release Notes: Information about changes and improvements in integrations