
Introduction
Hello! The day has come. Finally, it’s time to take the first step. We have already given a lot of theory in other articles and we already have the basic concepts clear, now let’s tinker.
Today, we are going to install Home Assistant Operating System on our computer with Windows, Linux or MacOS.
How are we going to achieve it? Using virtual machines, which speaking badly and soon, is like installing other operating systems within the operating system that you already have installed on your computer.
Why on a virtual machine? Virtual machines allow you to install Home Assistant OS almost on any computer FOR FREE, to try it without having to buy another computer. You can start in home automation, learn, break it, do all the tests you want, and if it convinces you, migrate it to a dedicated computer.
Previous Steps
Let’s start with the preliminary steps. This is the simplest part, you will only need a PC with Windows or Linux, or a Mac with MacOS. Do you have them? Perfect.
The next thing is to connect a network cable with Internet connection to the computer and to the rest of the devices in your house. It can work with WiFi, but Home Assistant gets along better with a wired connection to the router. You can now move on to the next step.
Install VirtualBox
To be able to work comfortably with virtual machines, we are going to use VirtualBox. There are many other applications capable of managing virtual machines. VirtualBox is one of the most well-known.
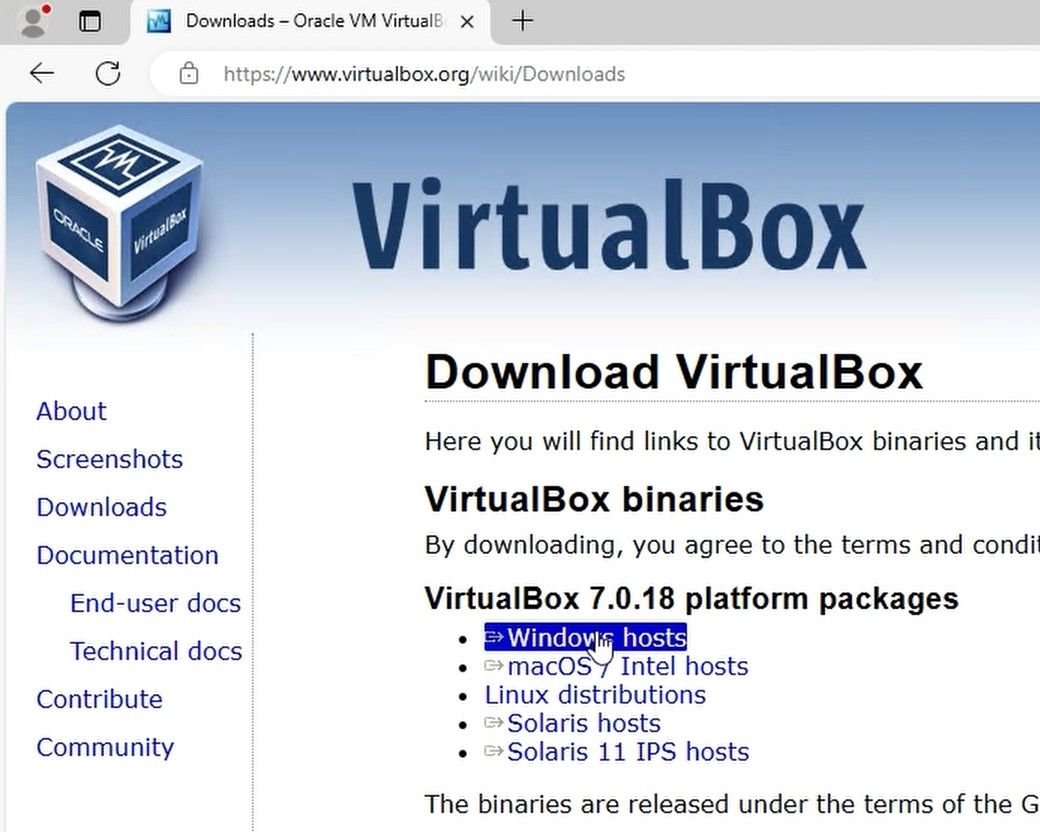
From the VirtualBox page, go to the Downloads section and download the latest version for our operating system.
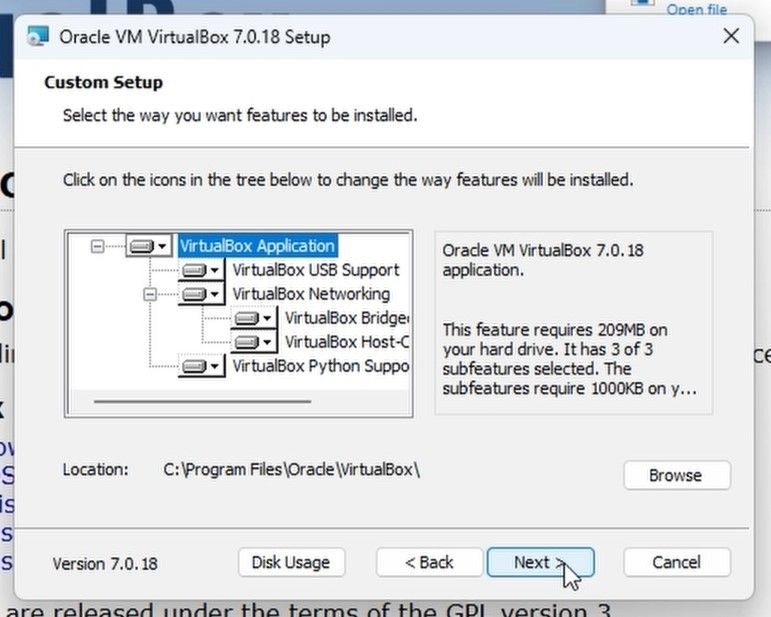
Open the installer once it is downloaded, follow the steps, it is not very complicated. Read carefully, but it is almost like clicking next and little else.
The Home Assistant Image
Virtual machine platforms like VirtualBox usually work with images, which are operating systems with configurations, applications and other things already created so that you don’t have to start from scratch.
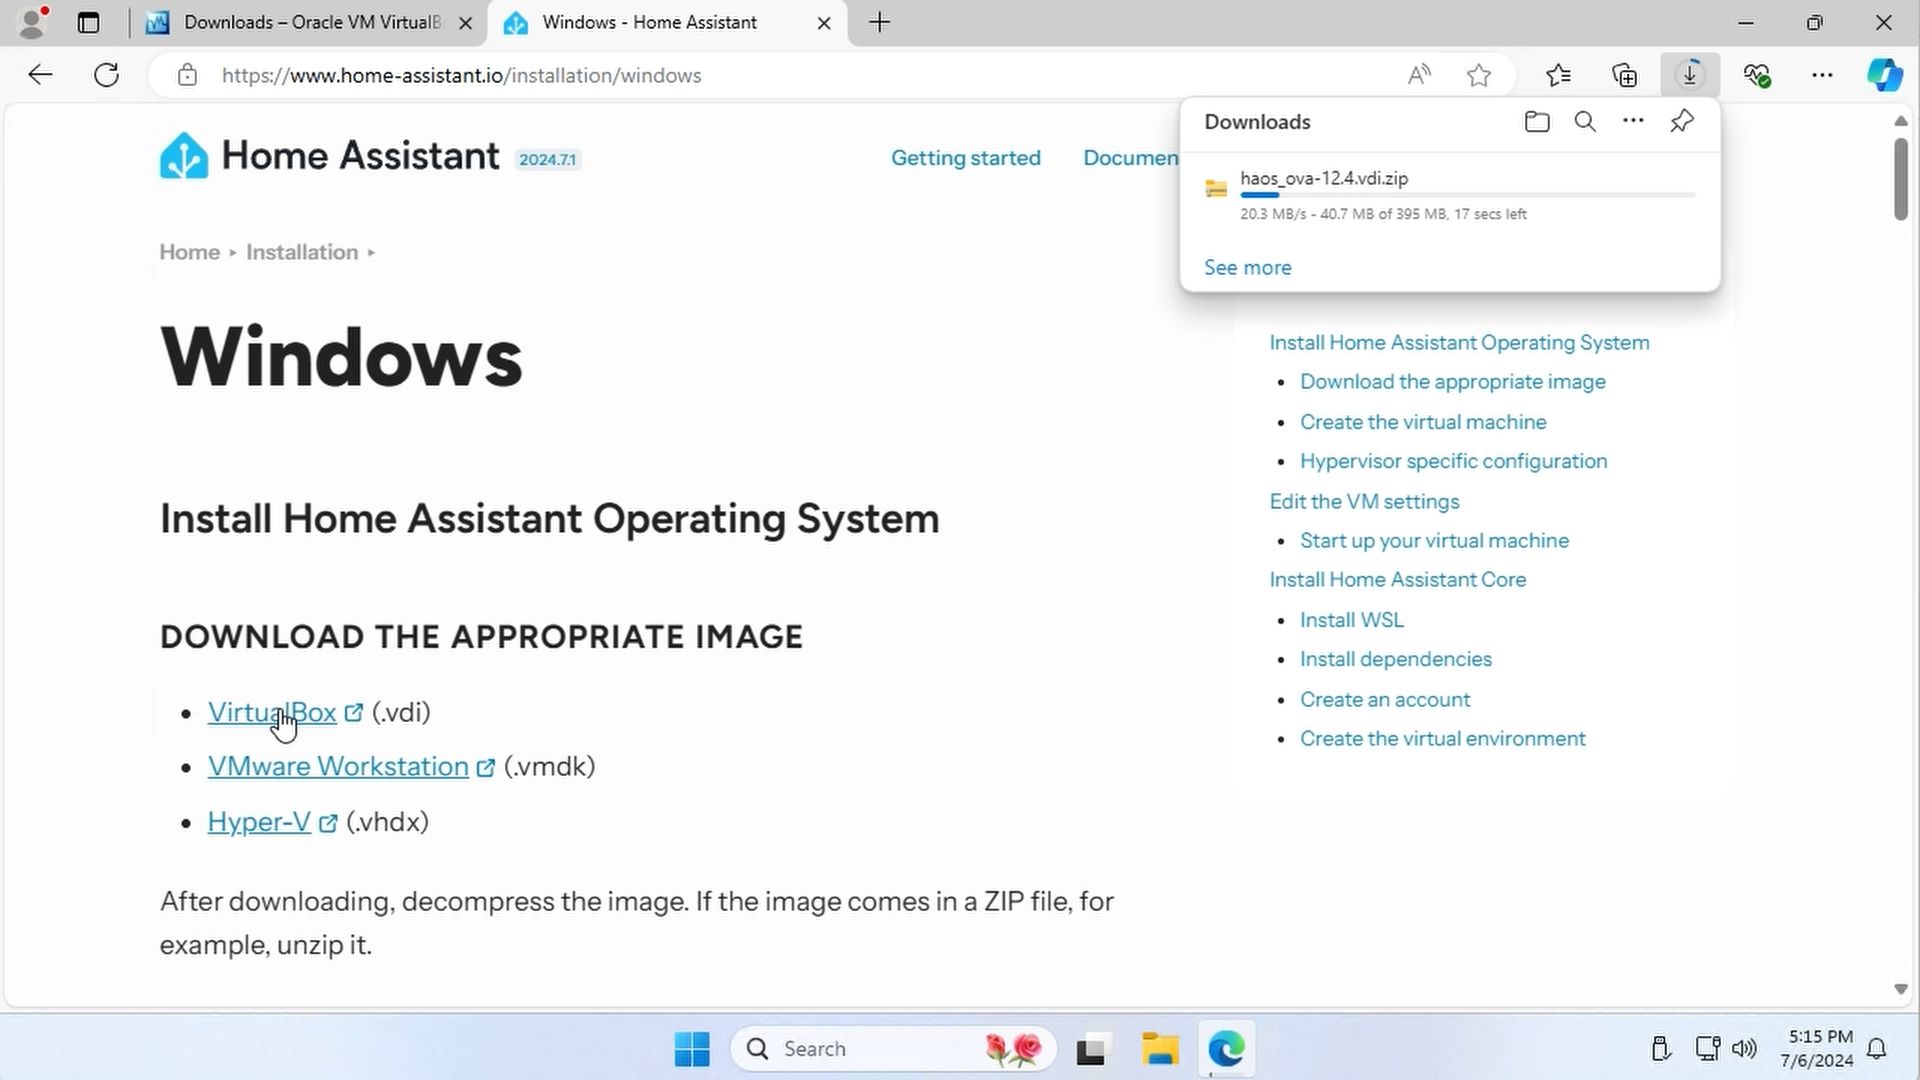
Home Assistant has different images available on its website for VirtualBox and other virtual machine platforms. We just have to enter the Home Assistant website, then we go to the Documentation -> Installation section, and at the end of the page we look for the operating system of the computer where we are going to create the Home Assistant virtual machine, once inside, we download the image for VirtualBox.
Create Virtual Machine
Once the image is downloaded, it probably comes compressed as a ZIP file. We decompress it.
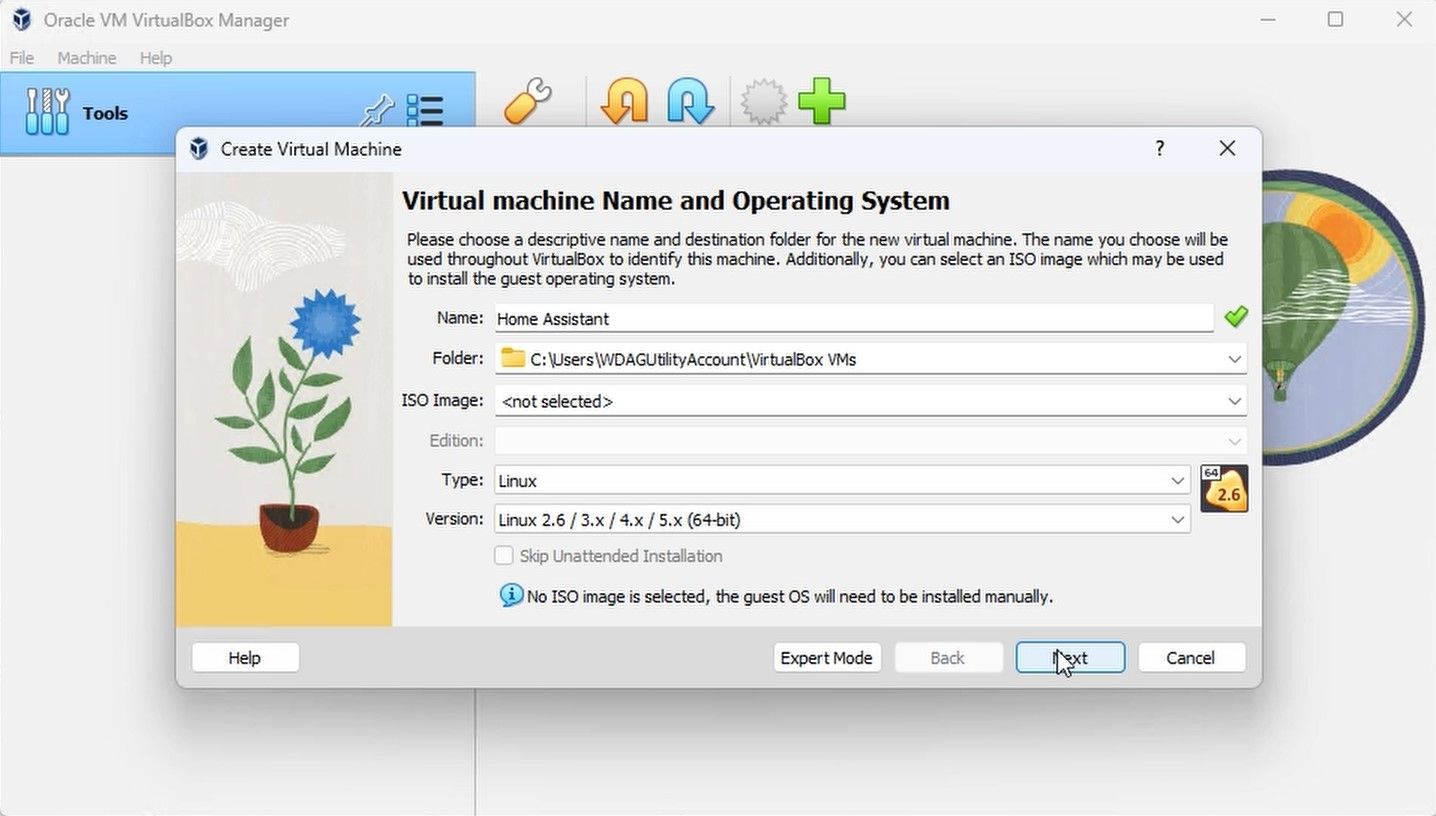
We open VirtualBox, and click on New. Give it the name you want, I’m going to call it Home Assistant, and in machine type Linux 2.6 / 3.x / 4.x / 5.x (64-bit). If you want, you can change the folder where the machine data will be saved.
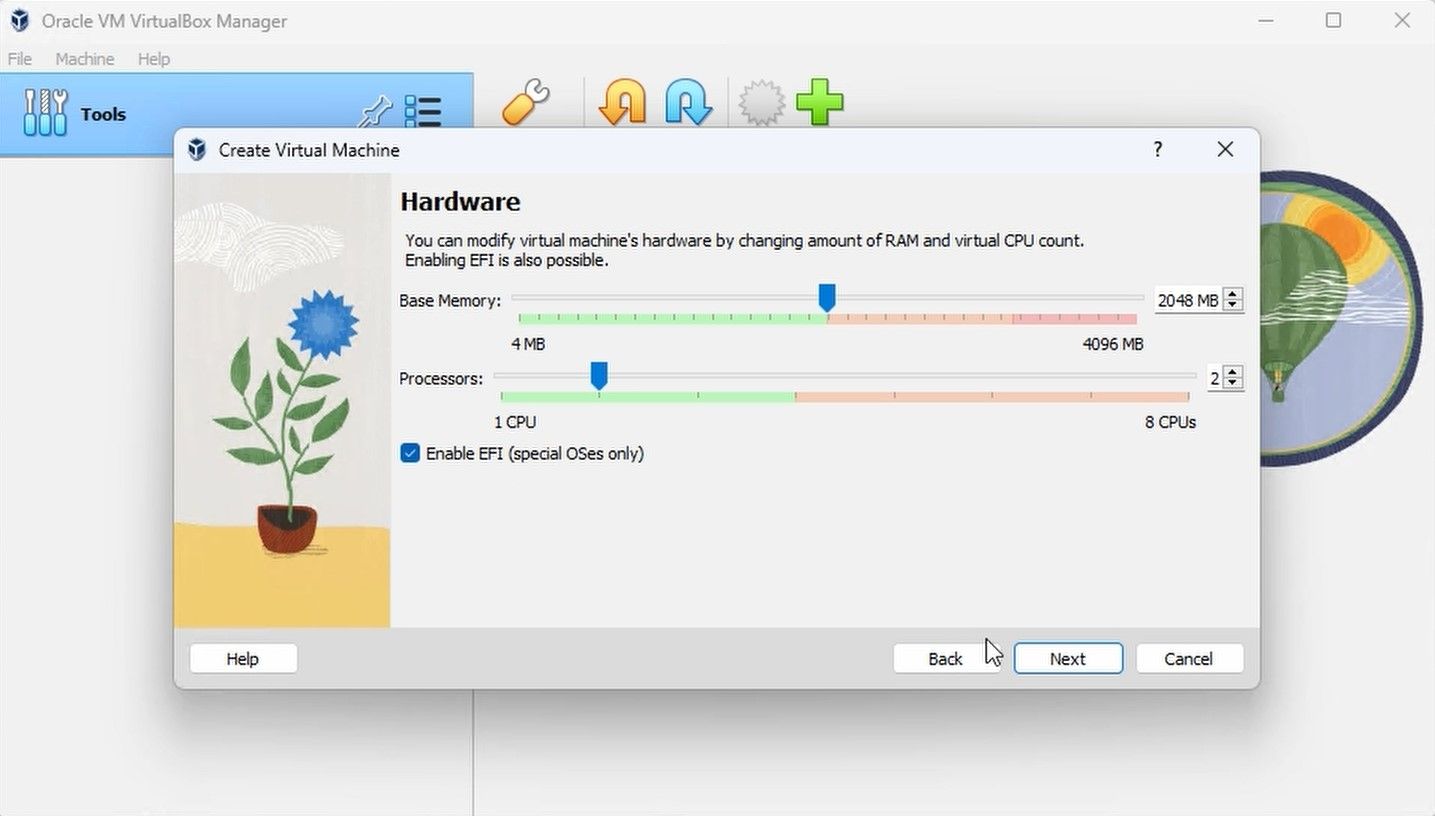
In the next window, activate EFI. It is necessary for Home Assistant Operating System to work. Regarding the number of processors and base memory, this is something you can change later. Home Assistant recommends a minimum of 2 GB of RAM memory and 2 Processors (CPU).
Finally, in the virtual hard drive window, select Use an existing virtual hard drive file, and select the VDI image file that you decompressed earlier.
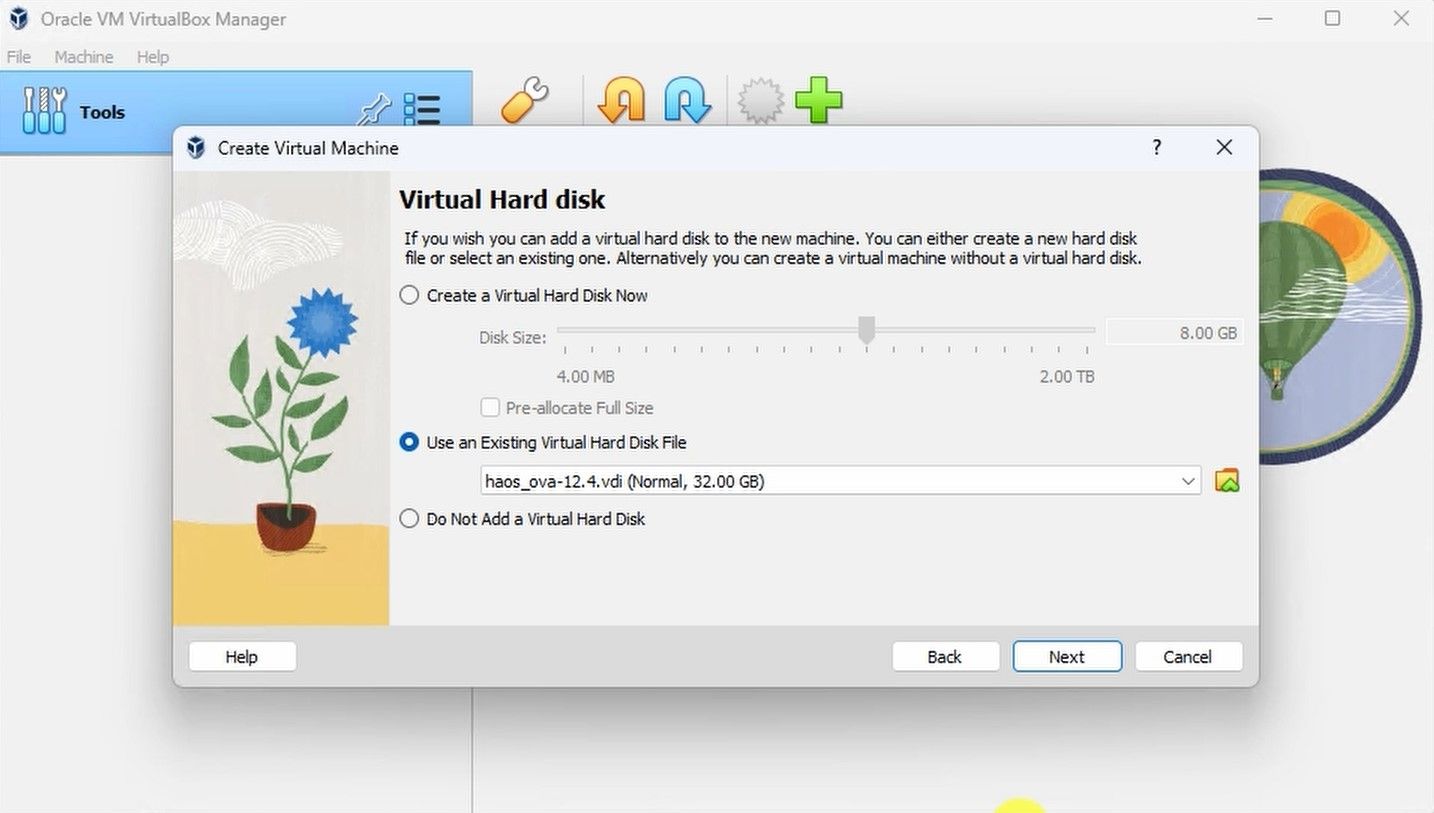
With this, you can create the virtual machine…
Once created, we go to Settings -> Network > Adapter 1 and choose Bridged Adapter and then select our network adapter.
In Settings -> Audio, we choose Intel HD Audio as the audio driver.
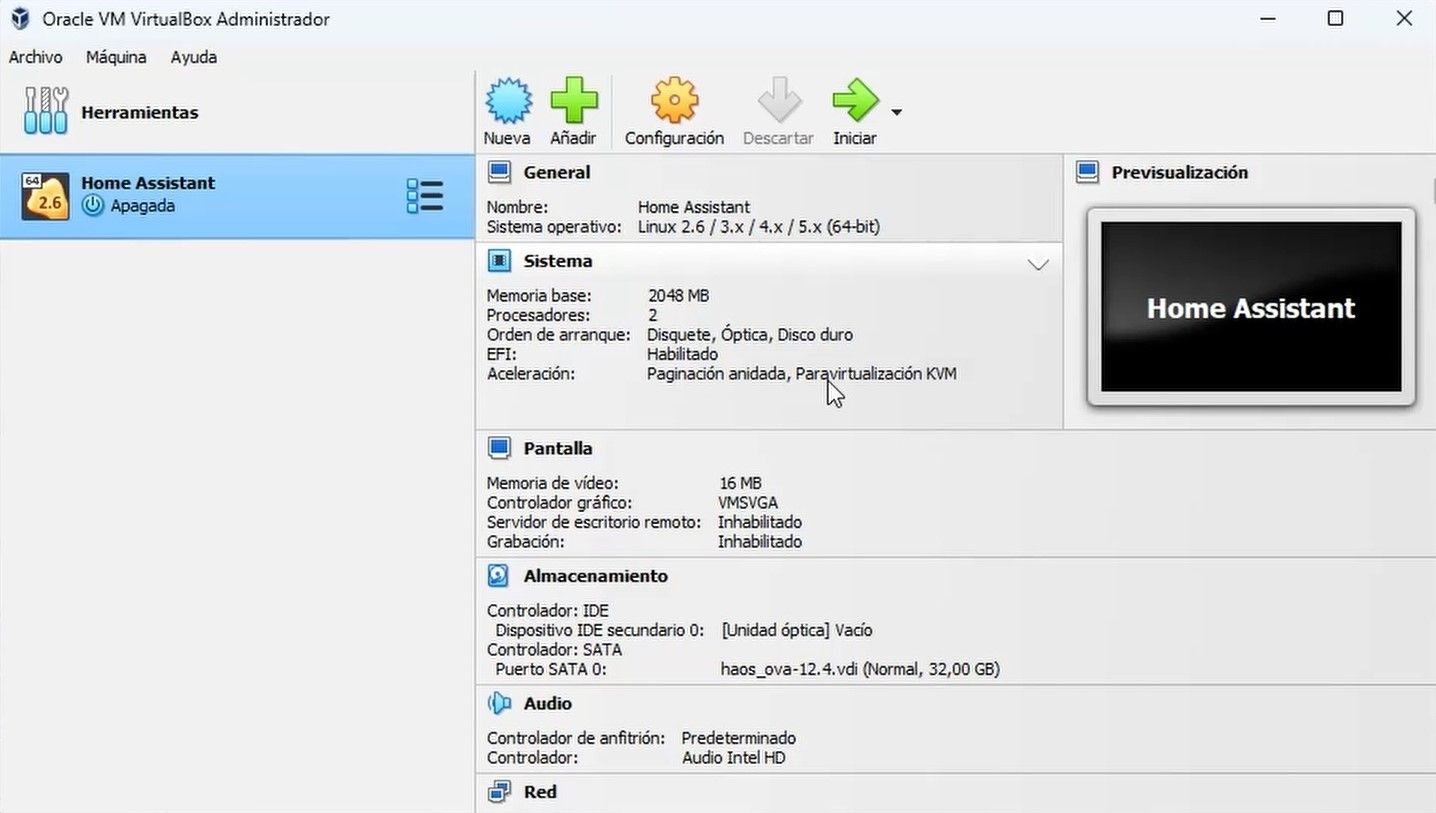
Done! You now have a virtual machine with Home Assistant Operating System.
Starting Home Assistant
You can now start the virtual machine. Wait a few minutes for Home Assistant to boot up.
When it’s done, you’ll see a screen like this. It indicates the IP of your Home Assistant server. Write it down.
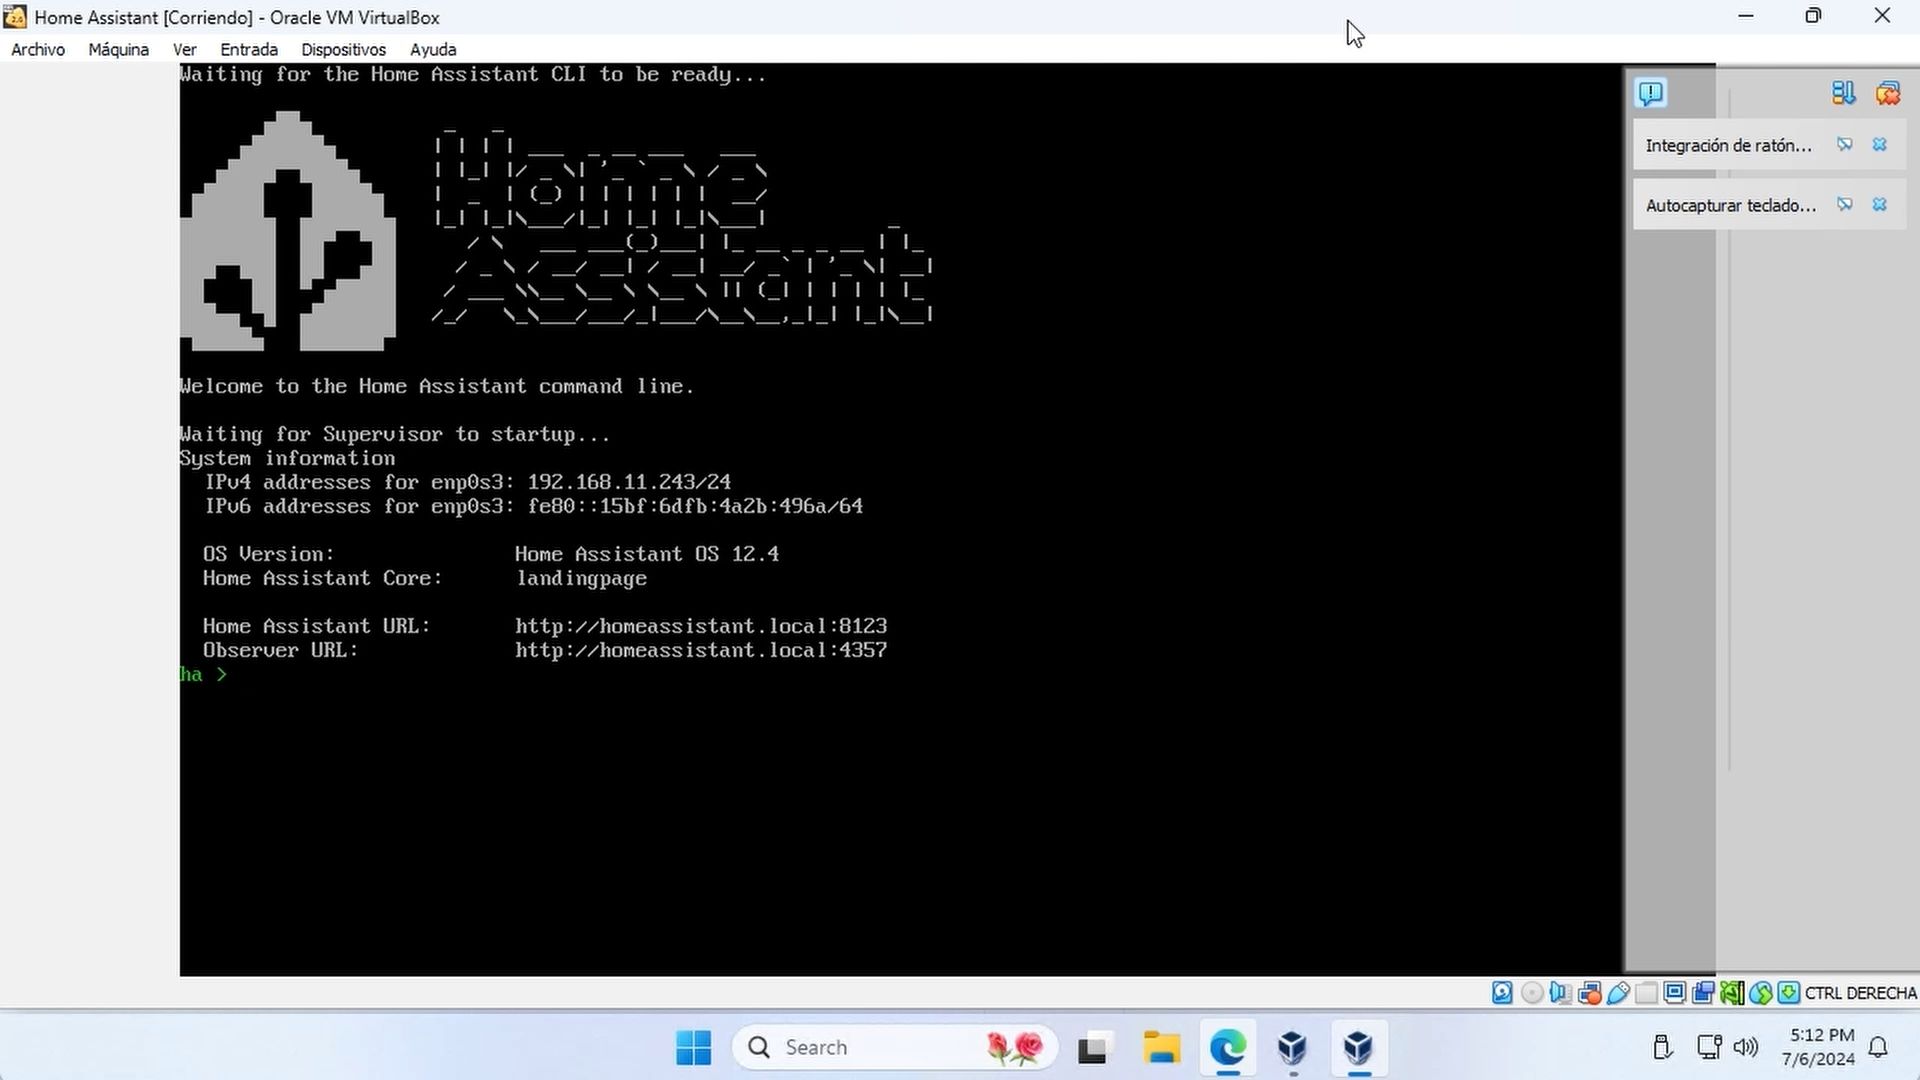
In your trusted browser, open homeassistant.local:8123. If that address doesn’t work, try homeassistant:8123 or by putting the IP that you just noted in the previous step, adding :8123 after, it will look similar to http://192.168.1.2:8123.
First Steps
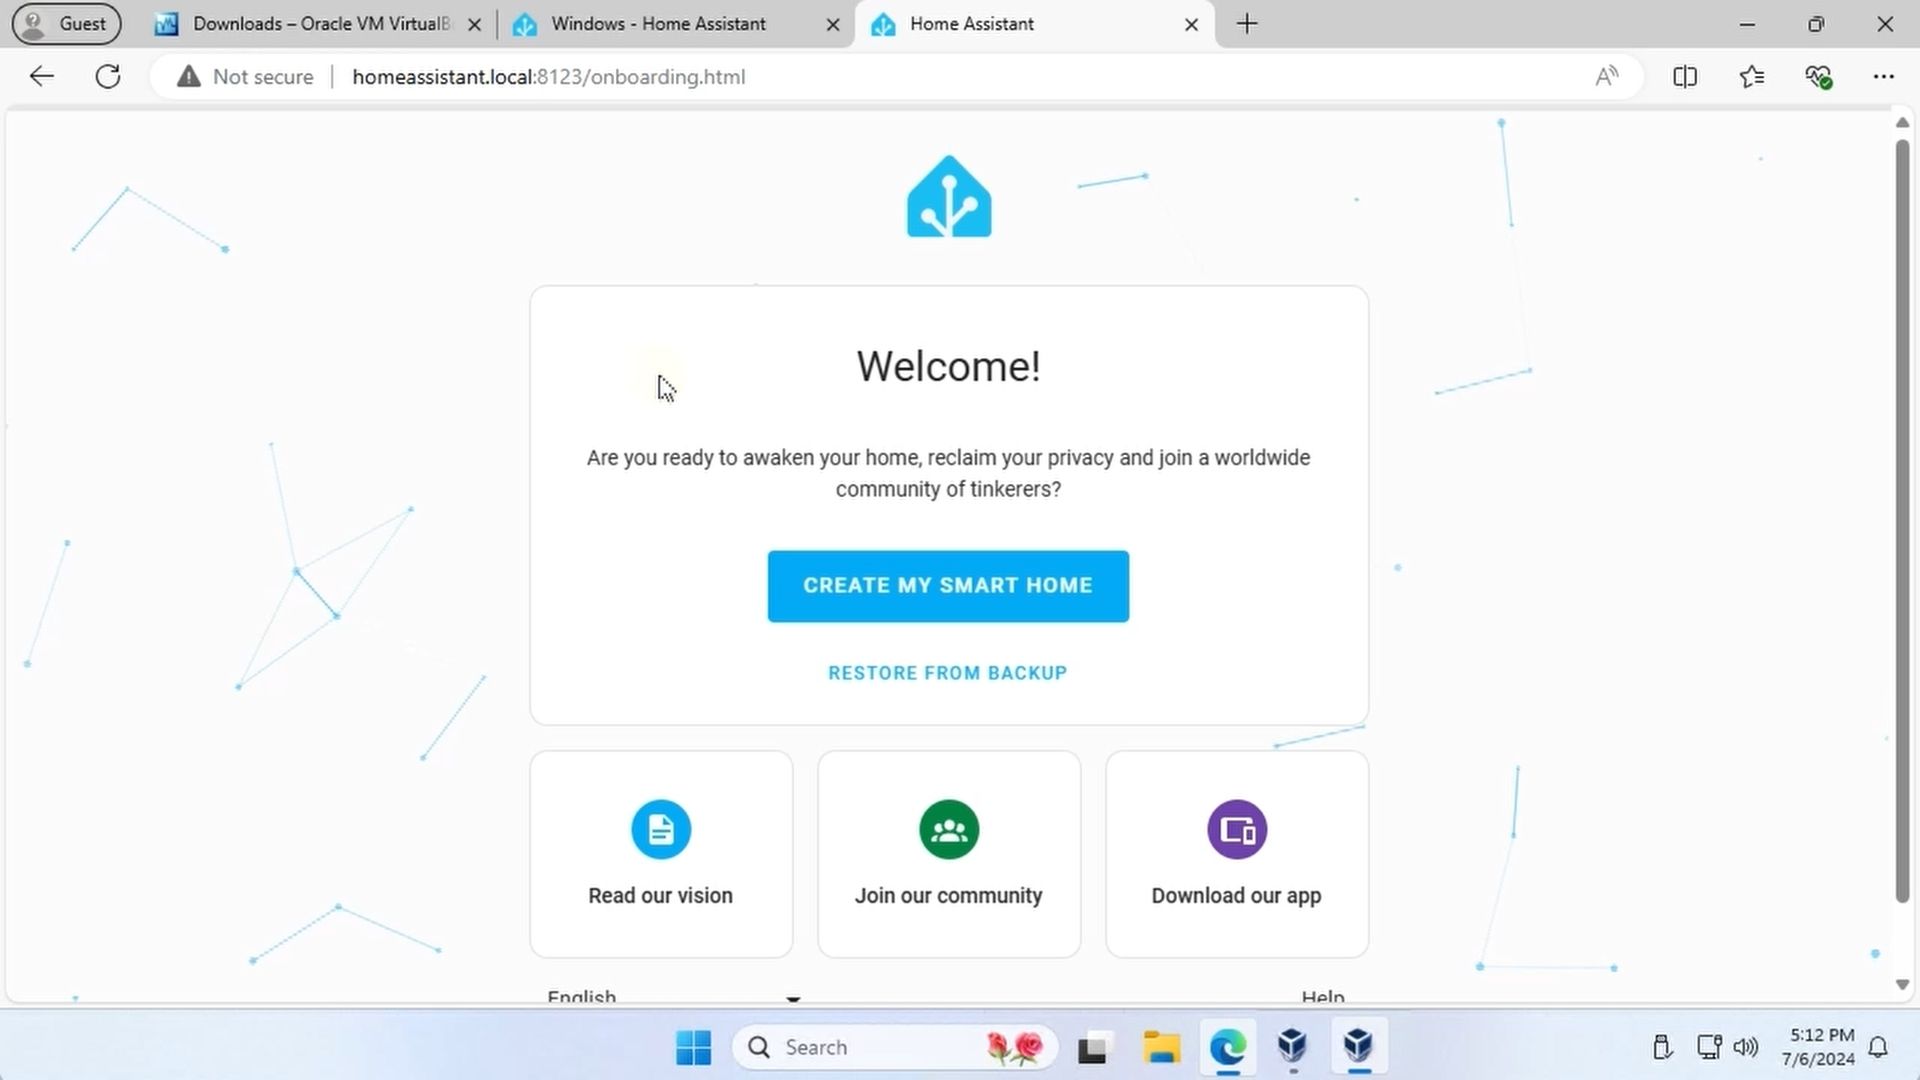
You will see a page as beautiful as this. We are now going to perform the initial configuration of our Home Assistant server. We click on Create My Smart Home.
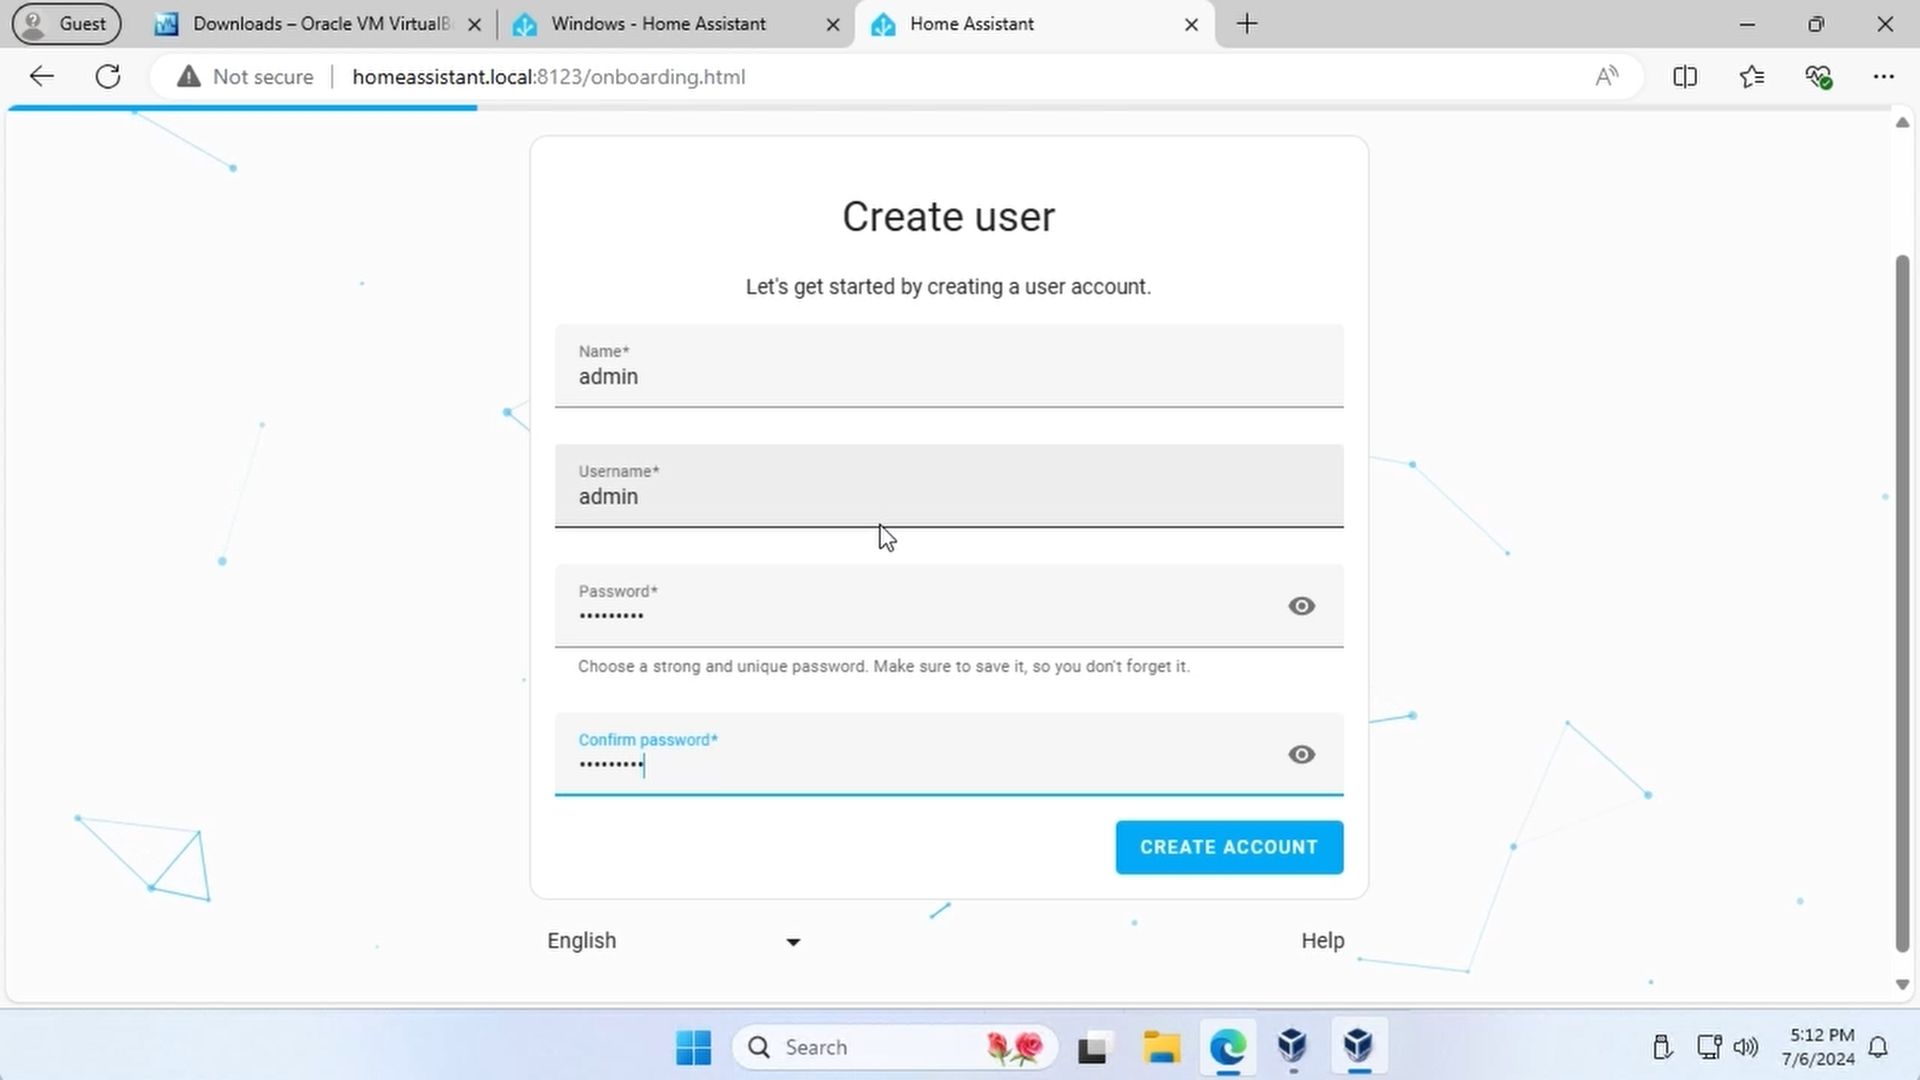
We indicate who will be the administrator user of the server. My recommendation is to have at least two users, one administrator who will be all-powerful, we can call it admin, administrator or whatever we like, and another one that is our personal user who does not have so many permissions. This way we will have extra security, the idea is that we log in as admin user, only when we have to change configurations and tinker with the server.
We look for our house on the map. You can be calm, all this information is saved on your computer and is not shared with third parties.

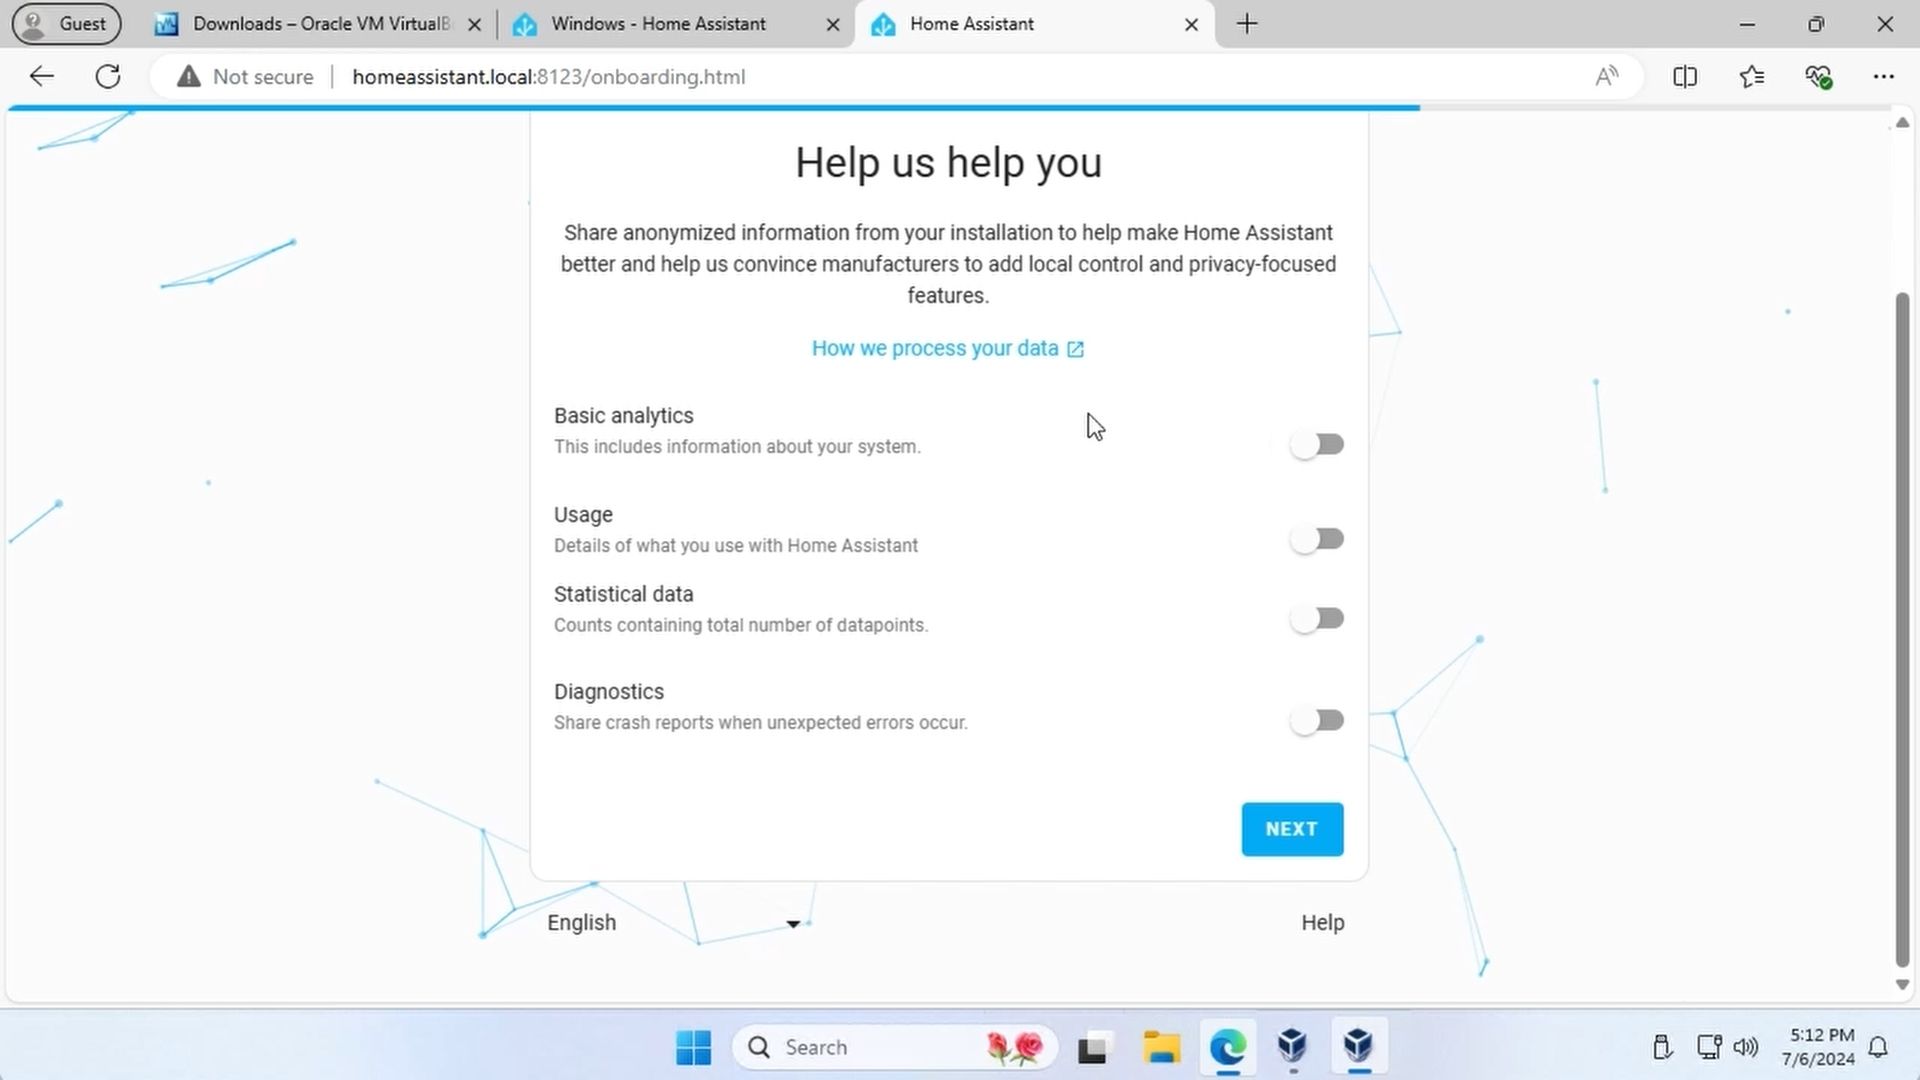
In the next step we mark if we want to share certain anonymous metrics with the developers of Home Assistant to improve the product. This is up to each one.
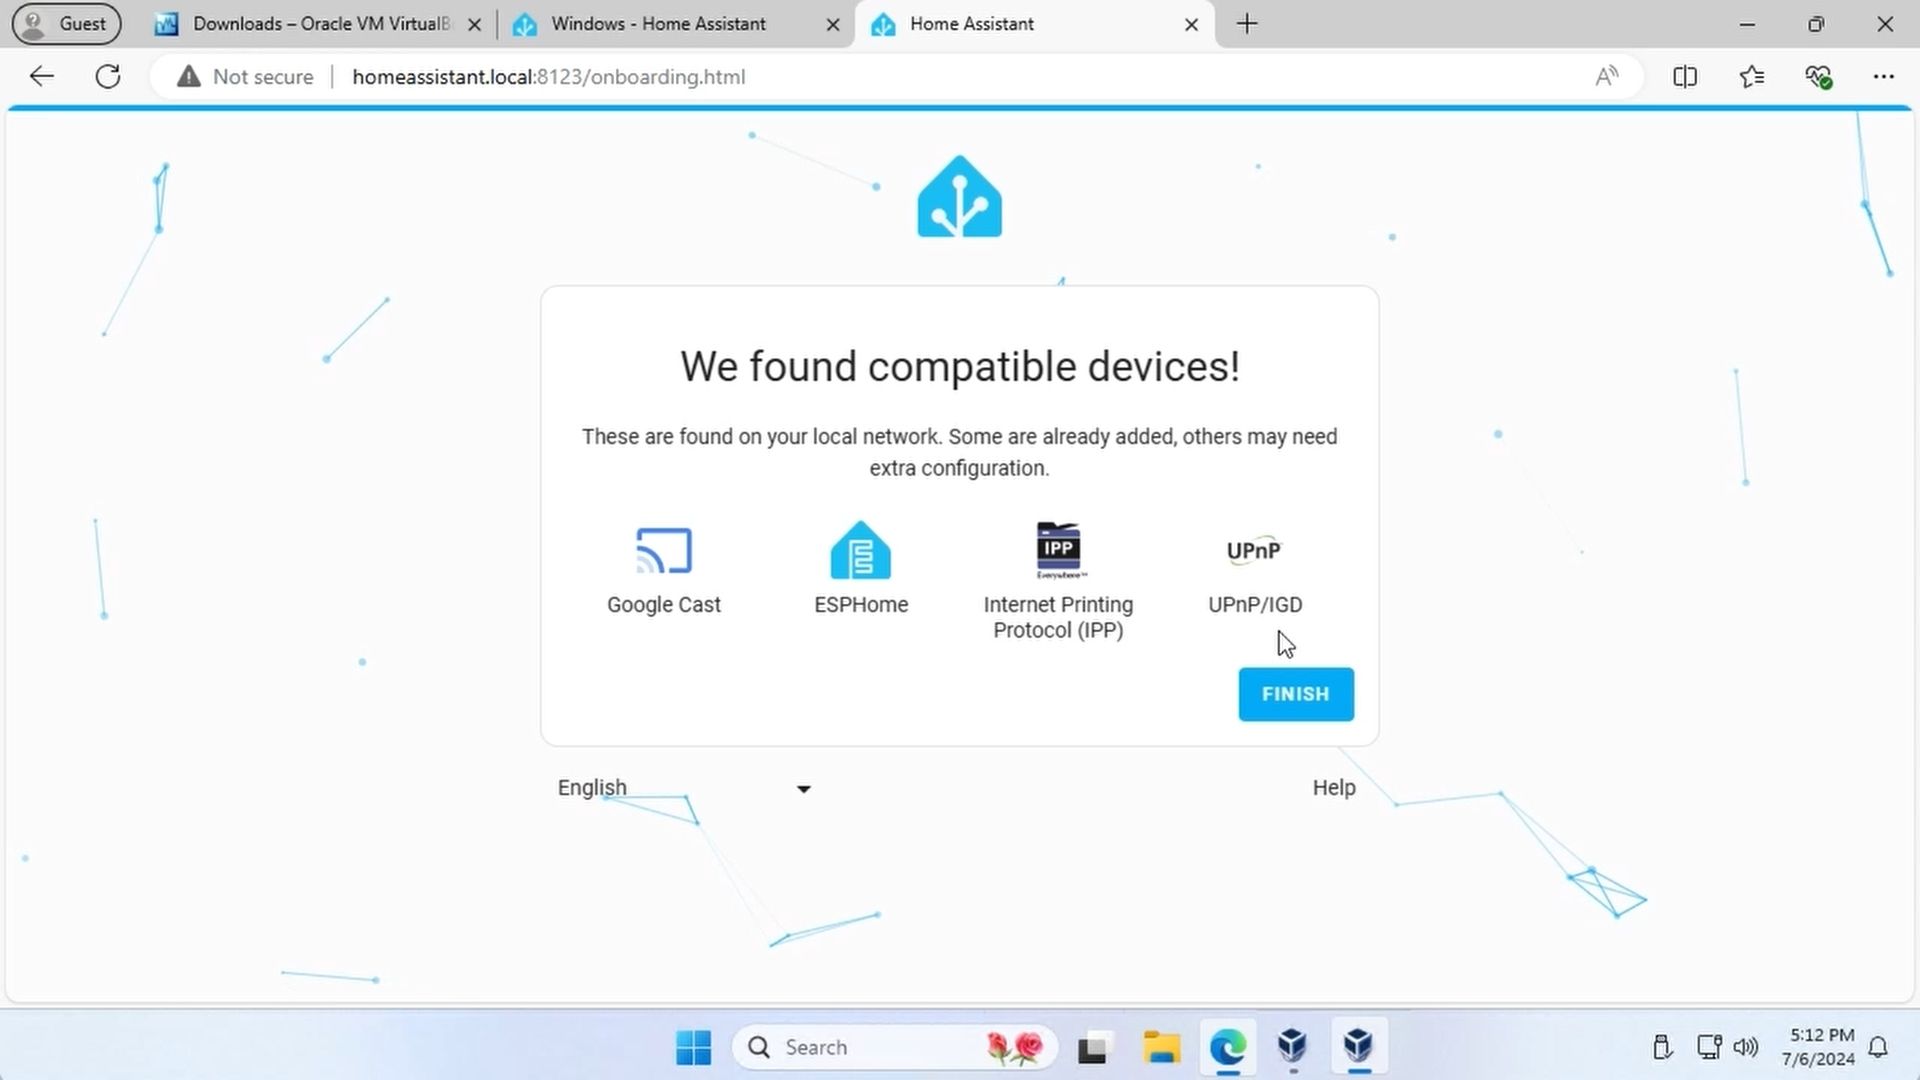
And that’s it. From this moment on, Home Assistant will detect the compatible devices it has been able to find on the network and will configure them.
Remember that you must have both the computer and the virtual machine turned on for the Home Assistant server to work and, therefore, the home automation.
Next Steps
What’s left for us? Well, start playing and reading the Home Assistant documentation. I hope you have fun.
Conclusion
And with this, you already have a virtual machine with Home Assistant Operating System running on your own computer. Another small step that brings you closer to the smart home of your dreams.
Don’t forget to share if you liked it. See you in the next article!