Introduction
Many of the integrations of Home Assistant can be added and configured without the need to edit files, but as you may have seen in the documentation, videos, and tutorials, a few lines of code are often required to perform certain configurations.
Therefore, it is useful to have and know some tools that allow you to modify the configuration files of Home Assistant. One of the simplest and most powerful is Studio Code Server.
Installation
Its installation is very simple. Home Assistant has add-ons, which are third-party applications that provide extra functionality. Add-ons run directly alongside Home Assistant. They work like the apps you install on your phone.
But do not confuse them with integrations, which are used to connect Home Assistant with other applications, devices, or services.
Remember that add-ons are only compatible with Home Assistant Operating System and Home Assistant Supervised installation types.
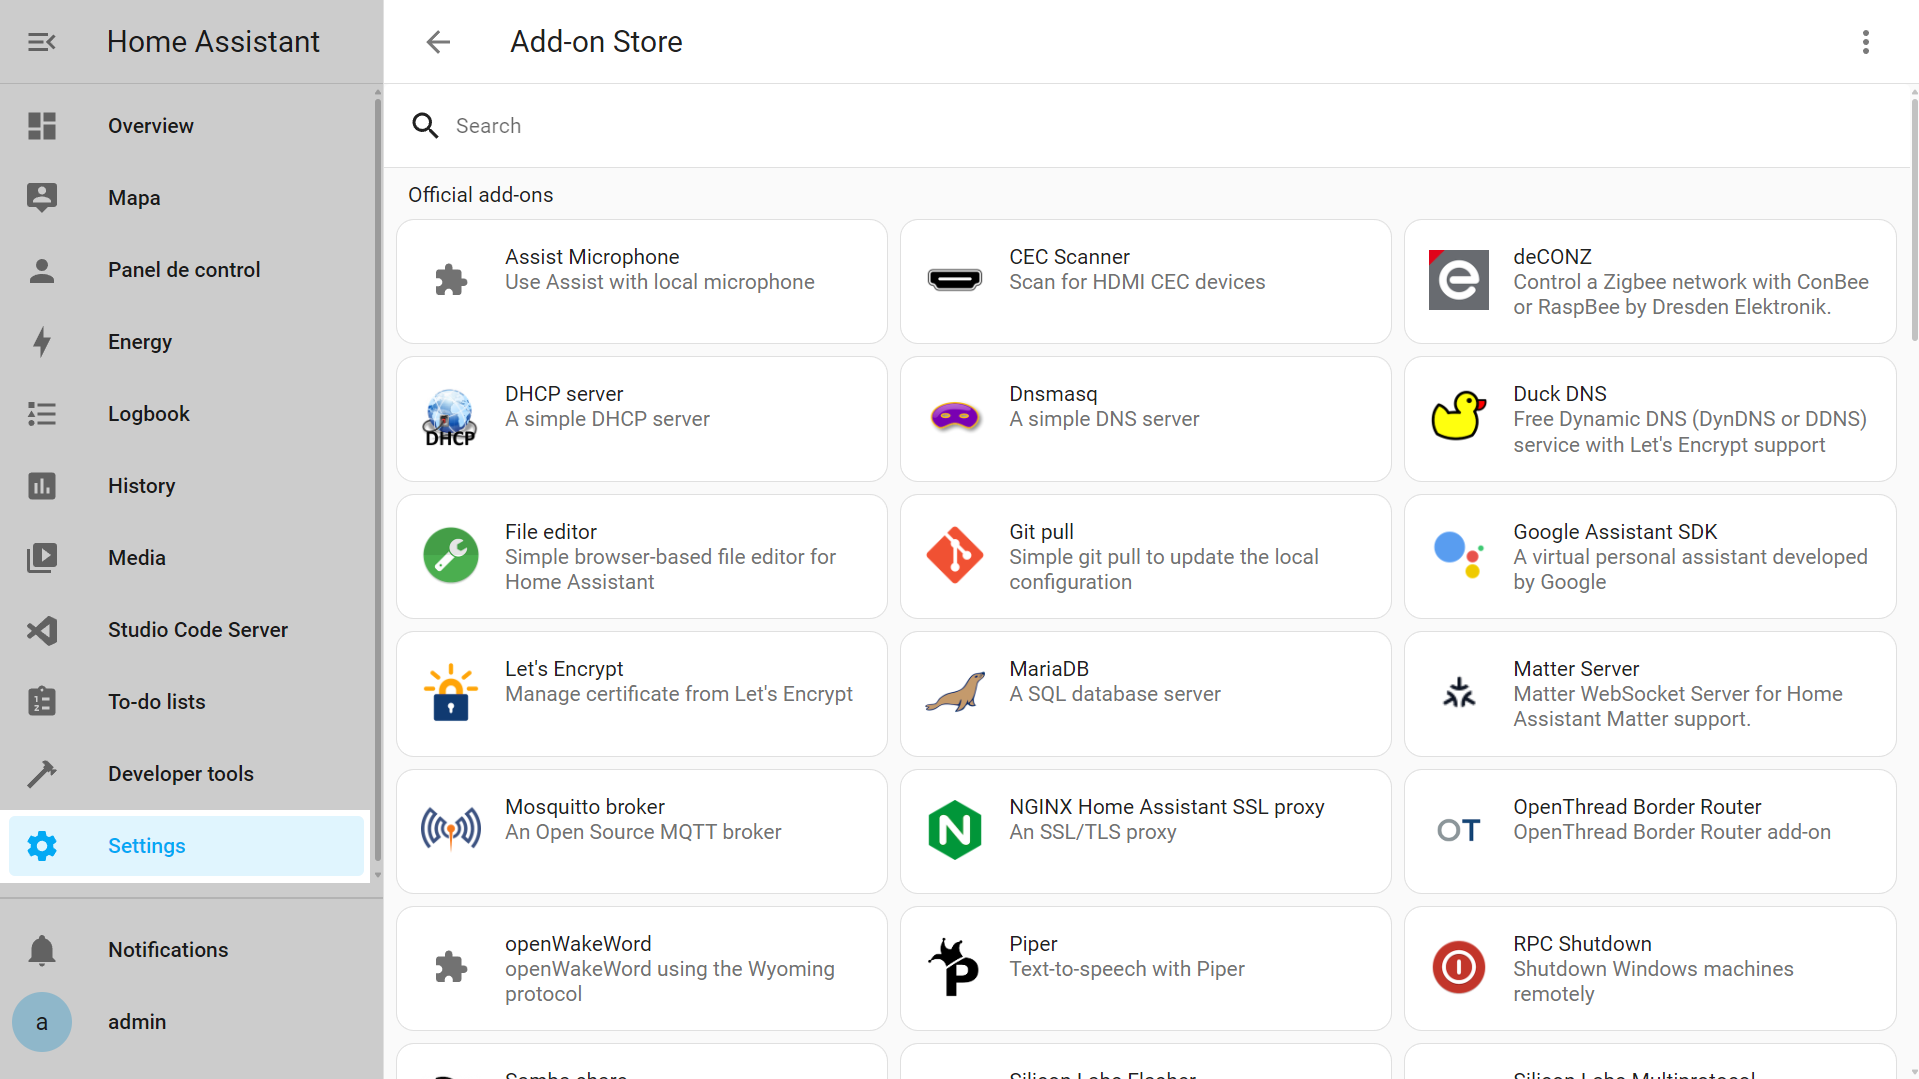
- From Settings ➡ Add-ons, go to the Add-on Store and search for Studio Code Server.
- Click on Install and wait a few seconds.
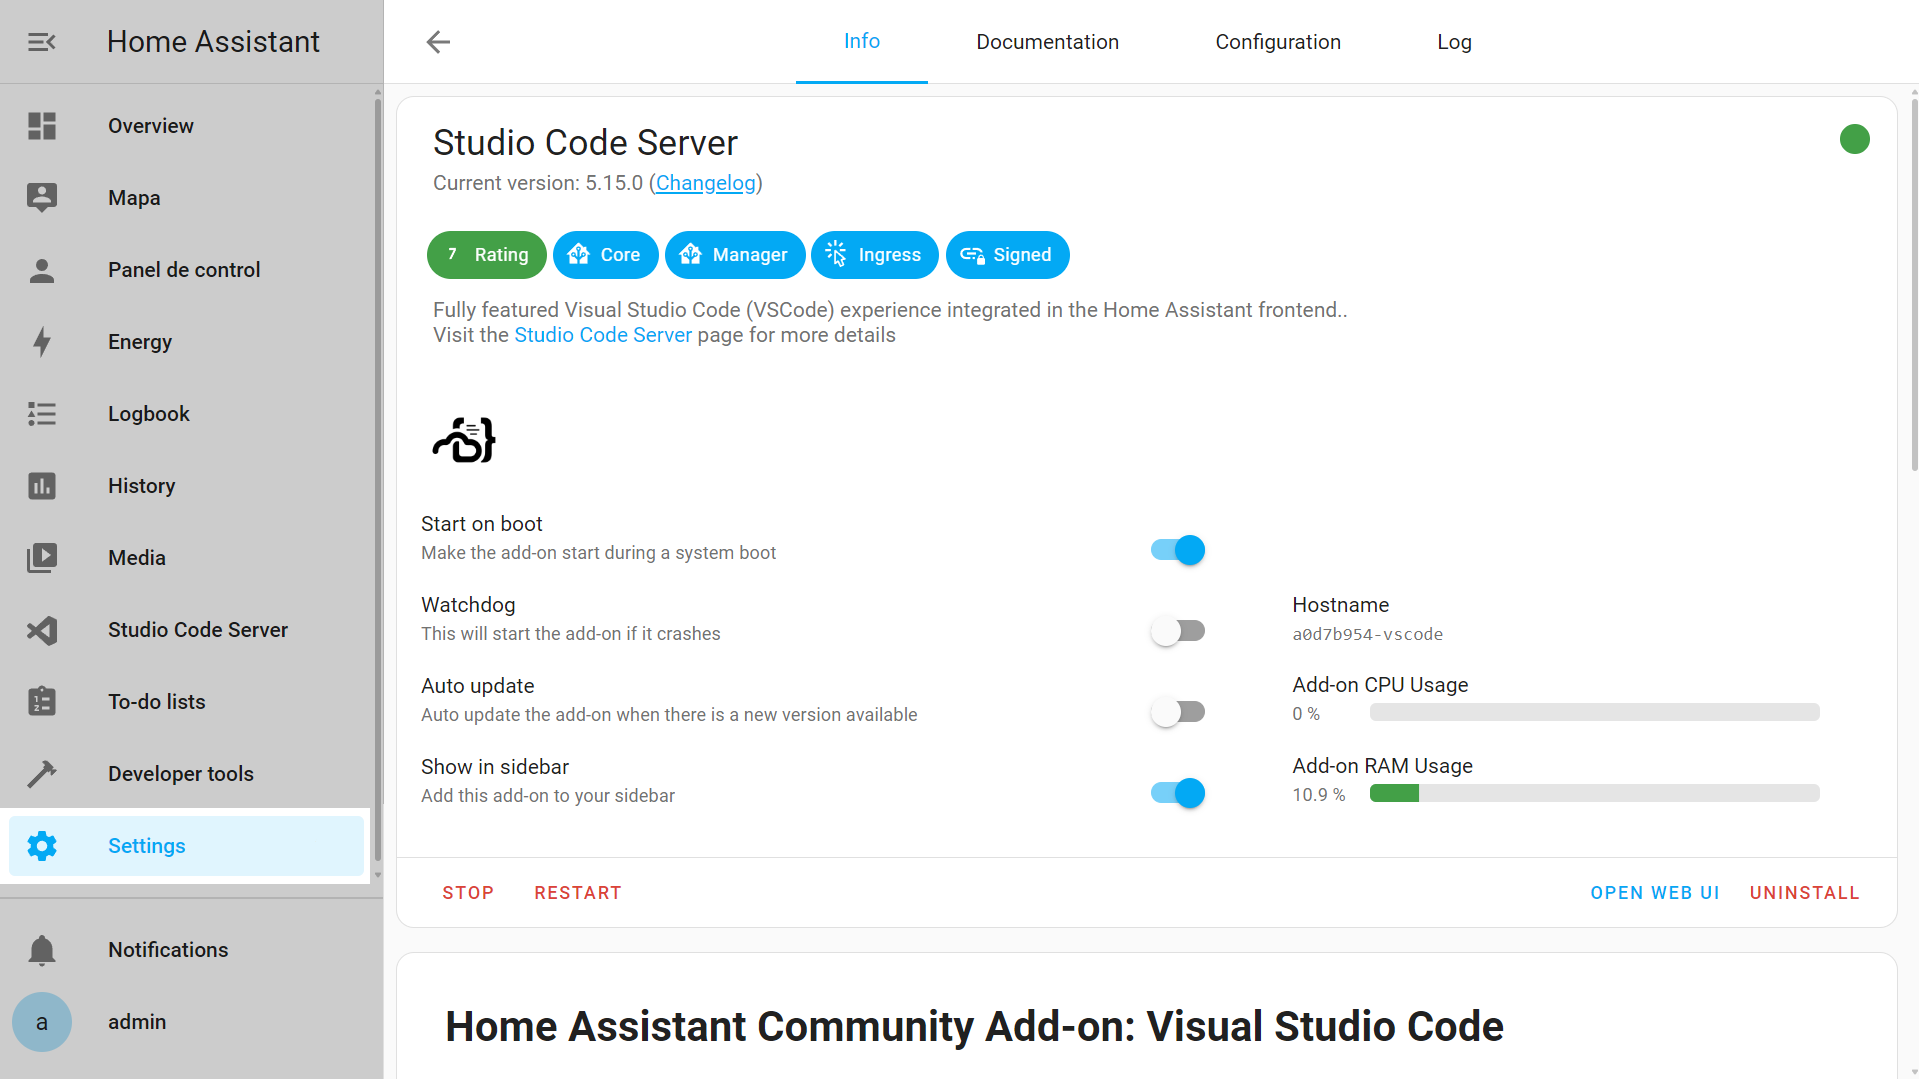
- Once installed, enable the options “Start on Boot” and “Show in Sidebar”. This will make it start automatically with Home Assistant and give us a shortcut in the left panel.
- Now click on Start.
Using Studio Code Server
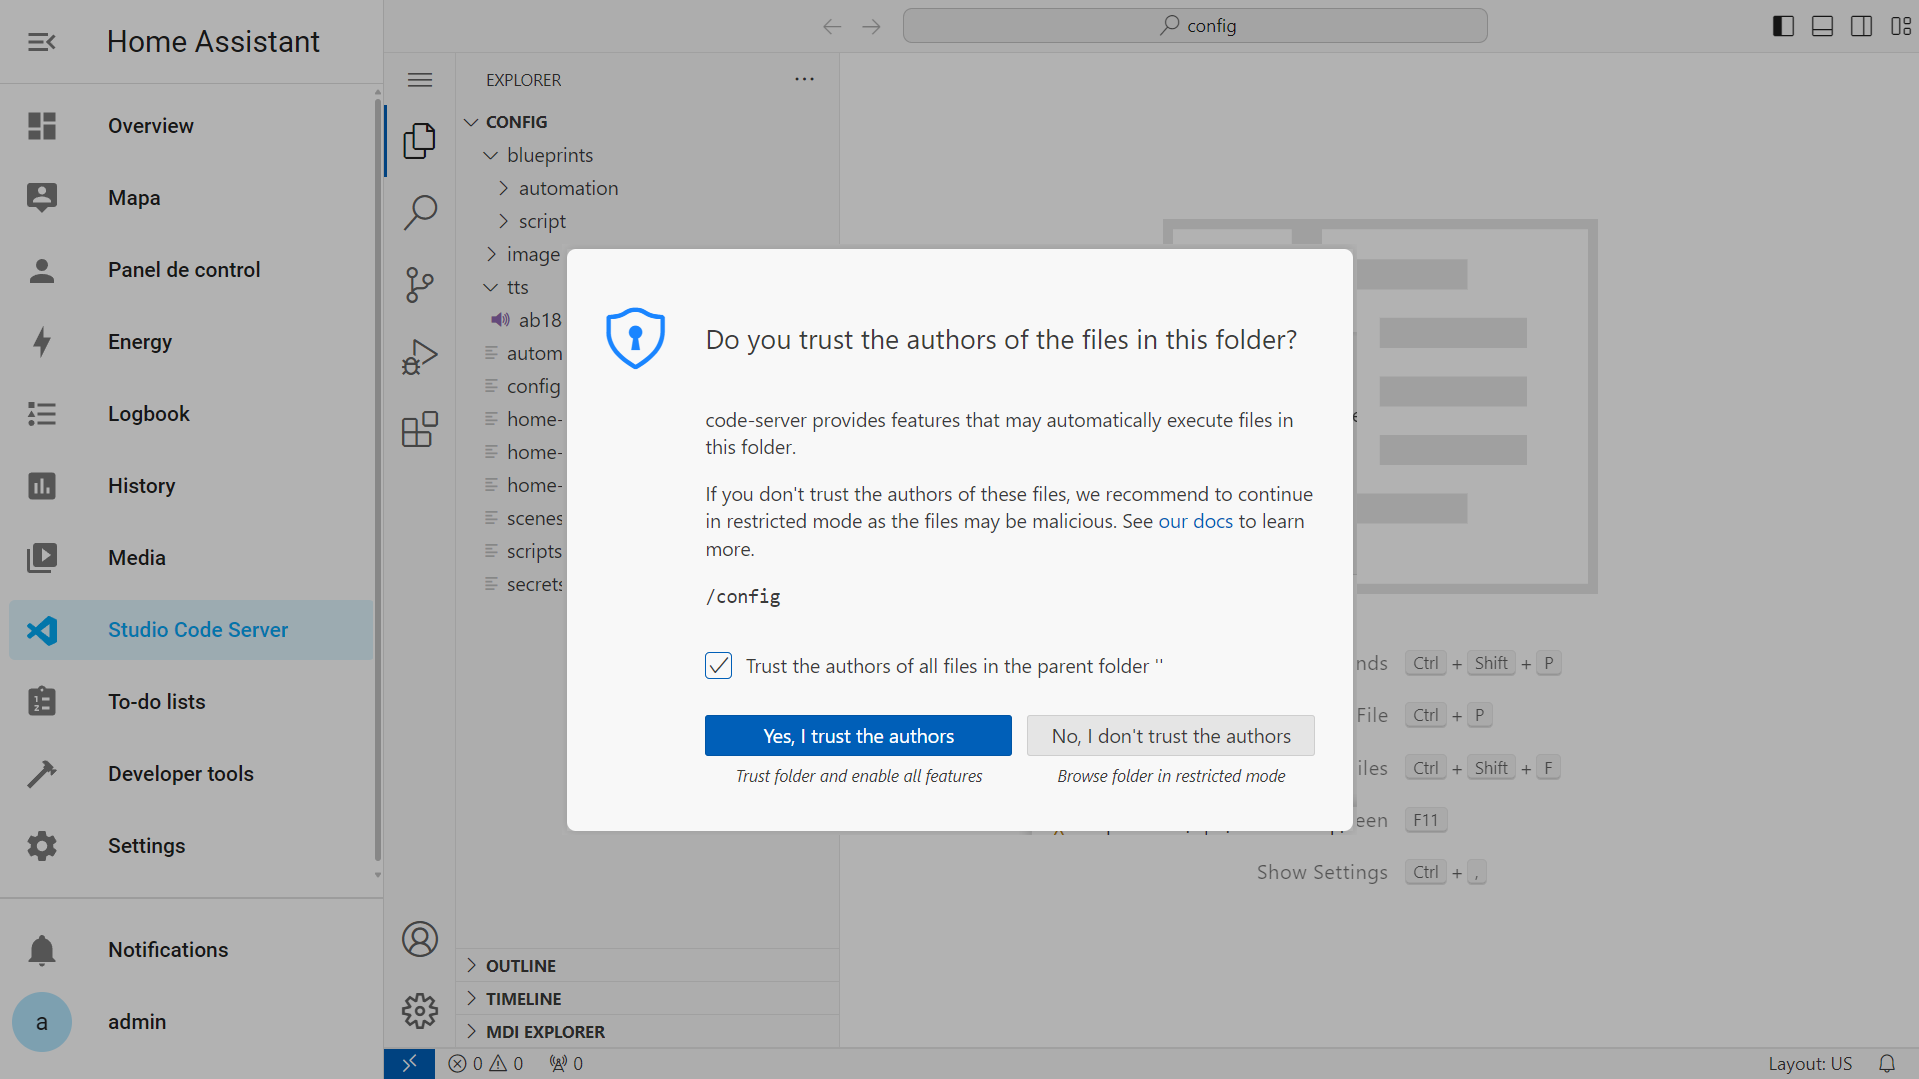
Once started, you can open the application from the Sidebar with the Studio Code Server button.
Since it is the first time, it will ask us if the config folder, which is the folder with the Home Assistant configurations, is safe. We say yes.
Home Assistant usually works with two programming languages, YAML and Jinja 2. Primarily, YAML is used for configuring integrations, scripts, or automations, and Jinja 2 for defining templates that will be used in certain parts of these configurations. They are not complicated languages, but it is advisable to have a basic understanding of how they work.
From the Studio Code Server window, we will see the contents of the config folder in the explorer section, which lists the Home Assistant configuration files.
By default, Home Assistant saves the configurations of integrations made through the interface in a hidden folder within config called .storage, which we cannot access from this editor. However, it does save the configurations of automations, scenes, or scripts within the YAML files with each name. For example, automations.yaml for automations. Changes made here will apply to the configuration of automations in the visual editor.
Integrations by Code
Most integrations are migrating to a configuration from the web environment, without the need for YAML code configuration. But, let’s perform an integration so you can see more or less how the editor works and learn to do them if necessary.
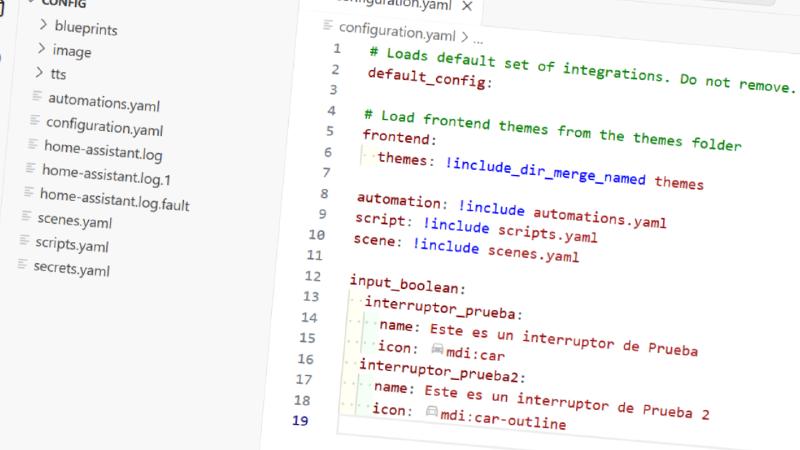
Integrations by code are done from the configuration.yaml file. Open it.
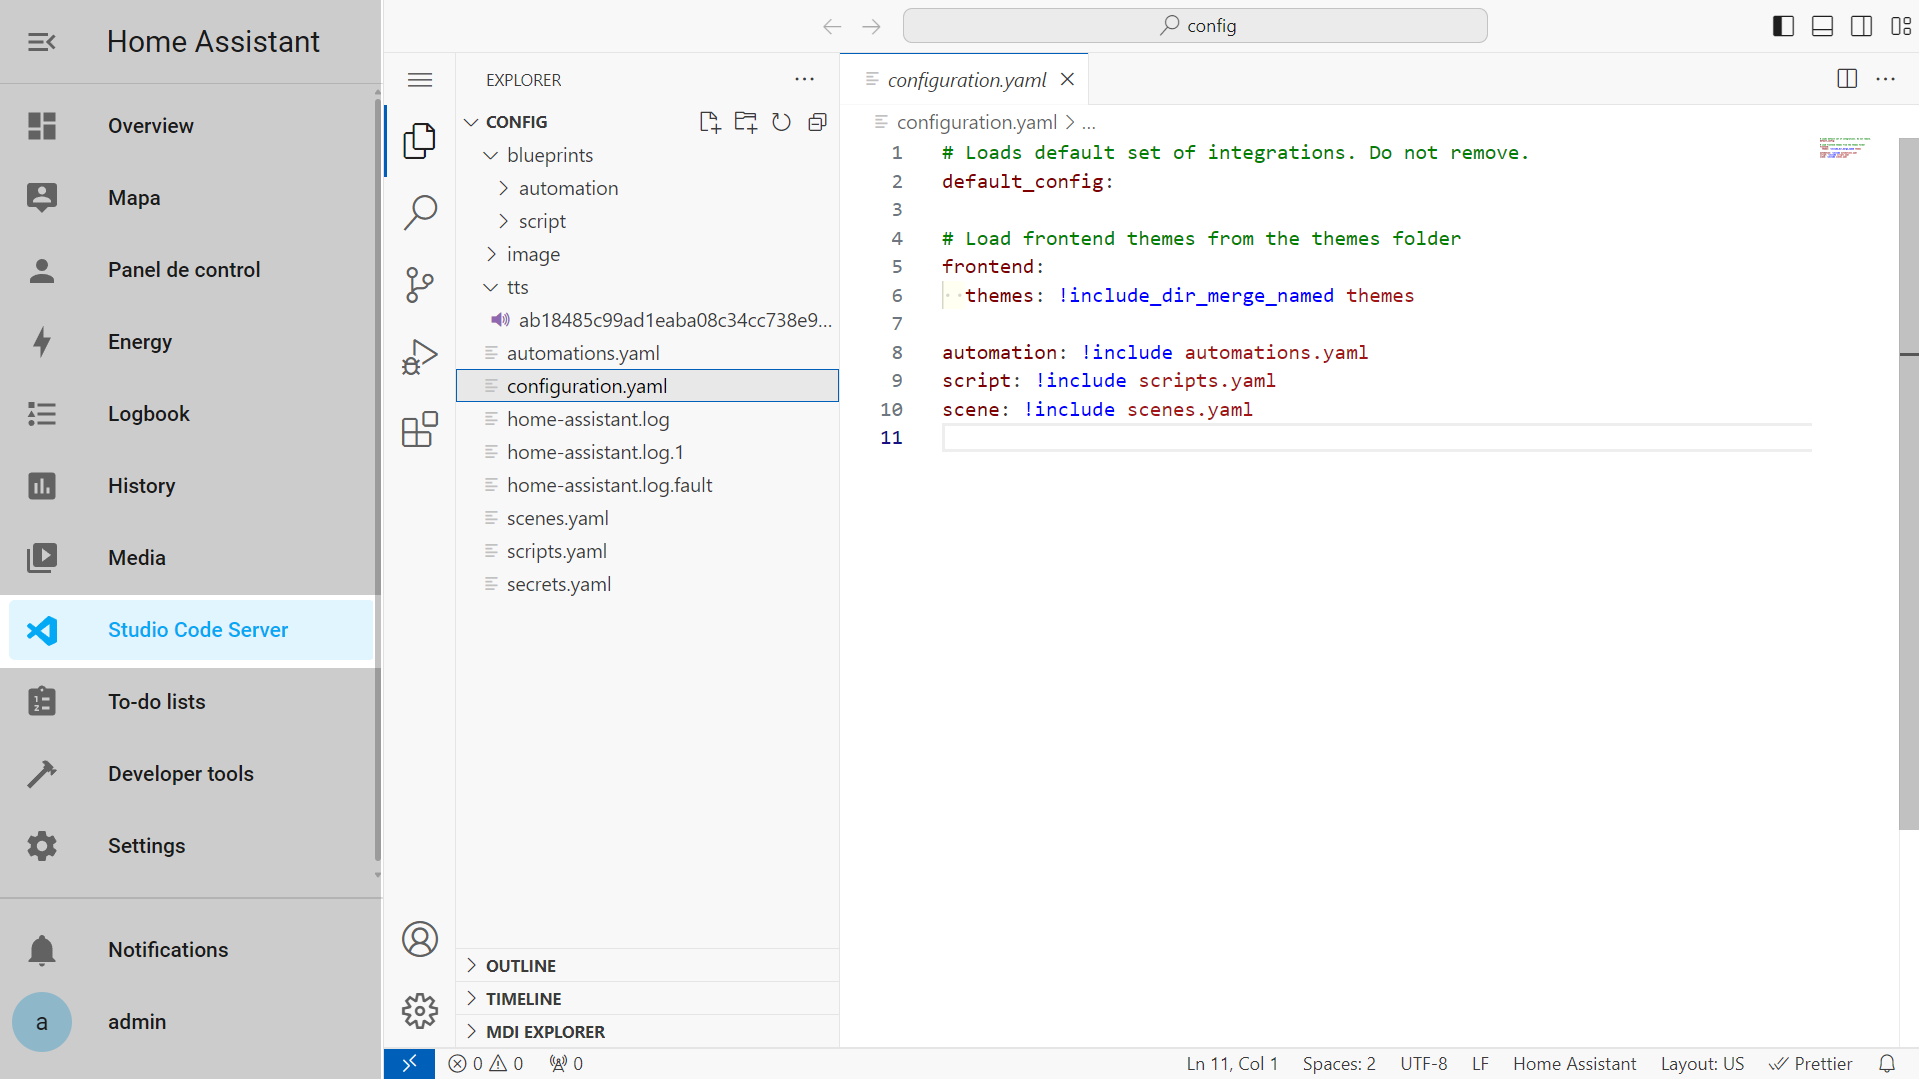
YAML is a markup language with indentation-based notation. This means that the spaces we leave on the left of each line are very important, as they define the block we are referring to. For example, in the configuration.yaml file that comes by default with Home Assistant, the blocks default_config, frontend, automation, script, and scene are defined. Within frontend, the themes block is defined.
If, for example, we want to define a toggle helper, or input_boolean in English. From the Home Assistant documentation, it indicates that we need to define and configure the following block of code:
| |
This code must go in its own block, therefore, respecting the spaces already defined within the block for each of the properties in the documentation, we will place it flush to the left in our configuration.yaml.
| |
Blank lines are ignored by YAML, so we can leave as much space as we want between blocks.
If we now want to add another toggle helper, and since in YAML the same text cannot be repeated at the same level, that is, at the same indentation, we can add another helper by repeating only the part of the block where the helper itself is defined and not the type, that is, it is not necessary to repeat the word input_boolean.
| |
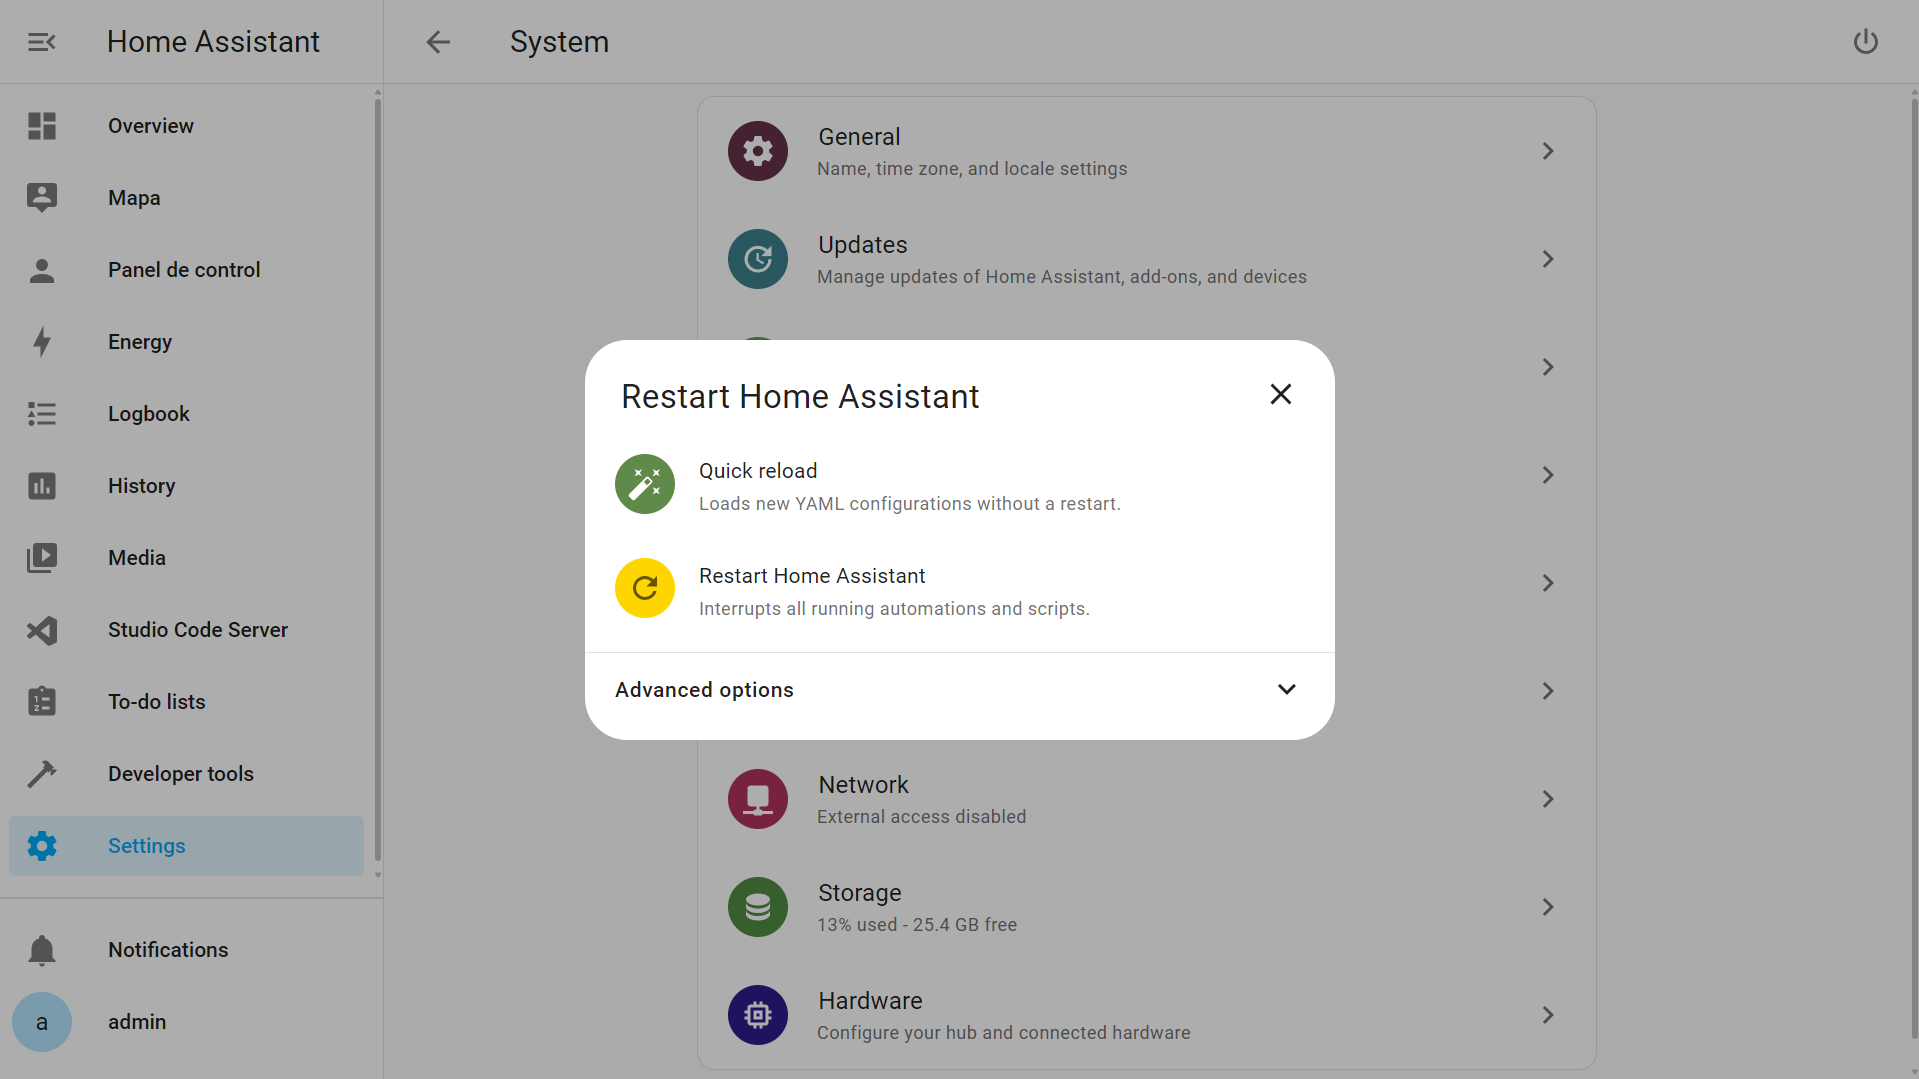
Once finished, and since changes are saved automatically, we will only have to reload Home Assistant for the changes to apply.
From the Sidebar, click on Settings ➡ System ➡ Quick Reload. It is not necessary to completely restart Home Assistant to apply this type of change.
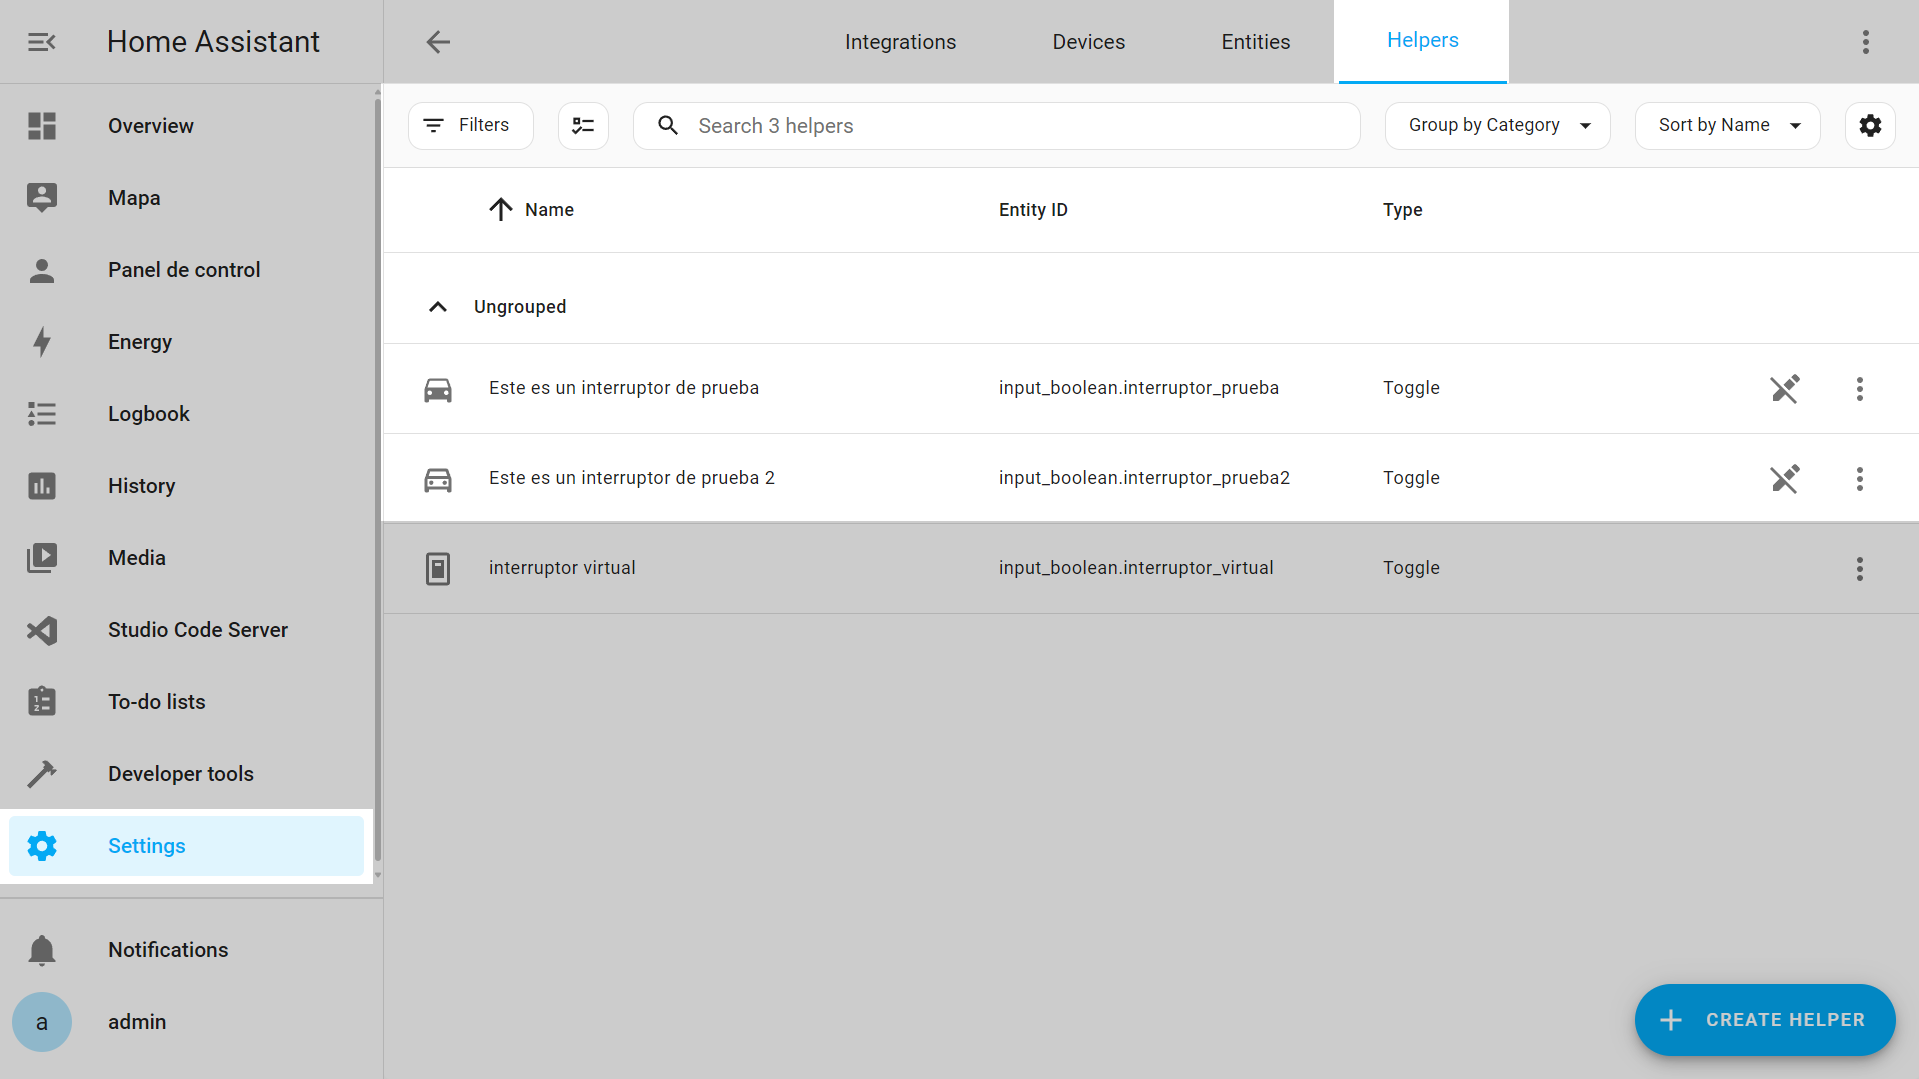
If we now go to Settings ➡ Devices & Services ➡ Helpers, we will see the two helpers we have created. As you can see, both have a symbol with a crossed-out pencil. This indicates that since they were created with YAML, part of their configuration cannot be modified from the interface.
Conclusion
From this point on, you will be able to make small modifications and add those integrations that require Home Assistant code configuration. Always remember to read the documentation. See you in the next article!